Wii Troubleshooting Manual: A Comprehensive Guide
Navigating the Wii’s complexities requires a detailed manual; this guide addresses power issues, gameplay glitches, system errors, and data management concerns.
Welcome to the comprehensive Wii troubleshooting guide! This manual aims to empower users to resolve common and complex issues independently. The Nintendo Wii, while revolutionary, isn’t immune to technical hiccups; From power failures and disc read errors to remote synchronization problems and frustrating system crashes, a multitude of challenges can arise.
This guide provides a structured approach to diagnosing and fixing these problems. We’ll cover everything from basic power supply checks and AV/HDMI connection troubleshooting to advanced topics like NAND error correction and softmodding with SoftMii Pack. Understanding error codes, such as F752/852 and -1035, is crucial for effective resolution. Remember, preventative maintenance, like cleaning the console, can significantly reduce future issues.
Understanding Common Wii Issues
The Nintendo Wii experiences a range of predictable problems. Power issues, including failure to start, are frequent, often stemming from the power supply. Display problems, like “no signal,” usually indicate AV or HDMI connection faults. Disc read errors can occur due to dirty discs or a failing drive. Gameplay is often disrupted by remote synchronization failures and motion sensor calibration inaccuracies.
System-level issues manifest as game freezes, crashes, and sluggish performance. Error codes, like F752/852, signal encoder problems, while -1035 points to IOS version conflicts. Data corruption, insufficient memory, and SD card compatibility issues also plague users. Understanding these common occurrences is the first step towards effective troubleshooting and maintaining a smooth gaming experience.
Power & Startup Problems
Addressing power failures is crucial; check the power supply, connections, and ensure proper voltage for a successful Wii startup and operation.
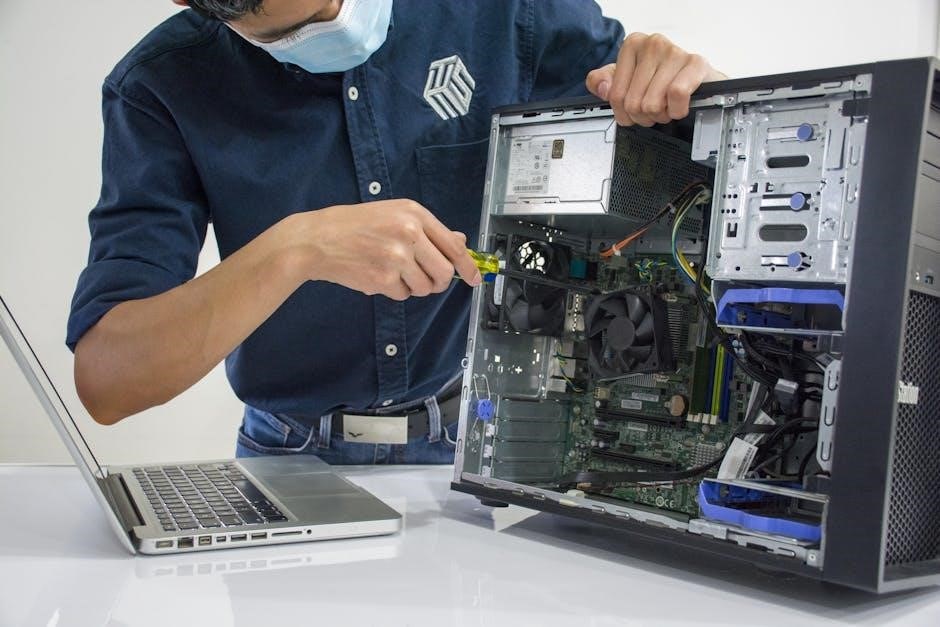
Wii Won’t Turn On: Power Supply Check
Initial troubleshooting begins with the power supply. Verify the AC adapter is securely connected to both the Wii console and a functioning wall outlet. Test the outlet with another device to confirm it’s providing power. Inspect the adapter’s cable for any visible damage, such as fraying or cuts, which could indicate a fault.
If possible, try a different, known-good Wii AC adapter to rule out a defective power supply. A faulty adapter is a common cause of the Wii failing to power on. Ensure the voltage on the adapter matches the Wii’s requirements (typically 12V DC). Also, check the DC input jack on the Wii console itself for any signs of damage or debris that might be preventing a solid connection. A multimeter can be used to test the adapter’s output voltage, but exercise caution if you are unfamiliar with electrical testing.
No Signal to TV: AV/HDMI Connection Issues
A black screen doesn’t always mean a broken Wii; connection problems are frequent culprits. First, confirm the TV is set to the correct input channel corresponding to the Wii’s connection (AV1, AV2, HDMI1, etc.). Cycle through the TV’s inputs to ensure the Wii’s signal is being detected.
Inspect the AV or HDMI cable for damage and ensure it’s firmly plugged into both the Wii and the TV. Try a different AV or HDMI cable to eliminate a faulty cable as the source of the issue. If using a component cable, verify the color-coded connectors are matched correctly. For HDMI, ensure the HDMI port on the TV is functioning correctly by testing it with another HDMI device. Resetting the Wii’s video output settings through the Wii Options menu can sometimes resolve compatibility issues.
Disc Read Errors: Identifying and Resolving
Encountering disc read errors is frustrating; several factors can cause this. Initially, inspect the disc for scratches, smudges, or debris. Clean the disc gently with a soft, lint-free cloth, wiping from the center outwards. Ensure the disc is inserted correctly into the Wii’s disc drive, label side facing upwards.
A malfunctioning disc drive can also be the issue. Try multiple games to determine if the problem is disc-specific or a console issue. Gently blow into the disc drive to remove any potential dust accumulation. If errors persist, the laser lens might be dirty or failing, requiring professional cleaning or repair. Avoid using abrasive cleaners or harsh chemicals on the disc or within the drive. Consider the age of the disc; older discs may degrade over time.

Gameplay & Performance Issues
Addressing gameplay problems involves synchronization, calibration, and performance optimization; issues like freezing, lag, and motion sensor inaccuracies require focused troubleshooting steps.
Wii Remote Synchronization Problems
Wii Remote synchronization failures are common, often indicated by a flashing blue light. Begin by ensuring fresh batteries are installed, as low power significantly impacts connectivity. Press the red sync button on both the Wii console and the remote itself, holding them close during the process.
Obstructions and distance can interfere with the signal; remove any potential barriers and reduce the distance between the remote and the sensor bar. Confirm the sensor bar is correctly positioned and securely connected to the Wii.
If multiple remotes are present, synchronize them individually to avoid conflicts. Occasionally, interference from other wireless devices may occur; try relocating the Wii or disabling nearby wireless signals. A complete power cycle of the Wii console can also resolve intermittent synchronization issues. Remember to check for physical damage to the remote or sensor bar.
Motion Sensor Calibration Issues
Inaccurate motion detection can ruin gameplay; proper calibration is crucial. Access the Wii settings through the system menu and navigate to the Motion Sensor Calibration section. Follow the on-screen prompts carefully, ensuring a well-lit and uncluttered play area.
Hold the Wii Remote as instructed during the calibration process, maintaining a steady hand and avoiding sudden movements. Recalibrate if you change the playing environment or experience persistent inaccuracies.
Ensure the sensor bar is correctly positioned above or below the TV screen and is free from obstructions. Check for reflective surfaces that might interfere with the sensor’s signal. A power cycle of the Wii can sometimes resolve calibration glitches. If problems persist, try a different sensor bar or Wii Remote to isolate the issue.
Game Freezing or Crashing During Play
Unexpected game freezes or crashes disrupt the gaming experience; several factors can contribute to these issues. First, ensure the game disc is clean and free of scratches. A damaged disc can cause read errors and instability. Try cleaning the disc with a soft, lint-free cloth.
Insufficient Wii memory can also lead to crashes, especially during save operations. Delete unnecessary channels or save data to free up space.
Close any background processes or unused channels. A system restart can often resolve temporary glitches. If the problem persists with a specific game, check for available updates or patches. Consider the possibility of a faulty game file or hardware issue if the problem is widespread.
Slow Menu Navigation & System Lag
Experiencing sluggish menu navigation or system lag detracts from the Wii’s usability; several solutions can improve performance. Begin by clearing the Wii’s system cache. This removes temporary files that can accumulate and slow down the system. Access the Data Management menu and select “Empty Wii System Memory.”
A full or fragmented system memory can significantly impact speed. Delete unused channels, virtual console games, and save data. Regularly defragmenting the system memory, though not a built-in feature, can be achieved through softmodding.
Ensure sufficient ventilation around the Wii console to prevent overheating, which can cause performance throttling. Close any background processes and restart the system to refresh its operation.

System Errors & Error Codes
Decoding Wii error codes, like F752/852 or -1035, is crucial; understanding these signals guides effective troubleshooting and system restoration procedures.
Understanding Wii Error Codes (e.g., F752/852)
Wii error codes are the console’s way of communicating problems, offering clues to pinpoint the source of malfunctions. Codes like F752/852 frequently indicate encoder issues, often stemming from mechanical binding or a faulty encoder magnet. A common first step involves resetting the encoder, as detailed in bulletin 154. These codes don’t necessarily signal a catastrophic failure; often, a simple reset or addressing a physical obstruction resolves the issue.
However, persistent error codes warrant further investigation. They can sometimes point to more complex problems within the Wii’s internal systems. Ignoring these codes can lead to escalating issues and potential data loss. Regularly checking online forums and support resources can provide specific solutions tailored to the encountered error code, ensuring a more efficient troubleshooting process.
Error -1035: IOS Version Conflicts
Error -1035 signifies a critical incompatibility within the Wii’s IOS (Input/Output System) versions. This typically occurs when a newer IOS version is already installed, while the loaded IOS is older and lacks the necessary compatibility. Essentially, the system detects a mismatch in the software components required for specific operations.
Resolving this error often involves ensuring all IOS versions are up-to-date and consistent. Users may need to reinstall or update the IOS through appropriate channels, carefully following instructions to avoid further complications. Incorrectly managing IOS versions can lead to system instability or even bricking the console. A detailed description of the error is often displayed, aiding in diagnosis. Proceed with caution and consult reliable guides before attempting any fixes.
NAND Error Correction (ECC) Explained
NAND flash memory, used in the Wii for system storage, is susceptible to bit errors during read operations. Error Correction Code (ECC) is a vital mechanism implemented to detect and correct these errors, ensuring data integrity. When the Wii encounters a bit error while reading the NAND, the ECC automatically attempts to rectify it.
A successful ECC correction indicates the error was minor and self-resolved, preventing data corruption. However, frequent or uncorrectable errors suggest underlying hardware issues with the NAND chip itself. This could signal impending failure. Monitoring ECC activity can provide insight into the health of the Wii’s internal storage. Consistent errors warrant further investigation and potential hardware replacement.
Addressing Bit Error Detection During NAND Reads
Detecting bit errors during NAND reads signifies potential data corruption within the Wii’s system memory. While ECC often corrects these, persistent errors demand attention. First, ensure a stable power supply; fluctuations can induce read errors. Regularly backing up your NAND contents to an SD card is crucial for data preservation.
If errors persist, consider a full system format, though this erases all data. For advanced users, tools exist to analyze ECC logs, pinpointing failing memory blocks. However, hardware failure is often the root cause. Attempting to repeatedly read from a failing NAND can exacerbate the problem. Professional repair or console replacement may be necessary if errors continue despite these measures.

Storage & Data Management
Efficiently managing Wii storage is vital; address insufficient memory, SD card compatibility, and data transfer issues for optimal performance and a seamless gaming experience.
Insufficient Wii Memory: Managing Saves & Channels
Dealing with limited Wii internal memory is common. Regularly archiving save data to an SD card is crucial, especially for frequently played games. Delete unused Virtual Console titles and Wii Channels to free up space. Consider the ‘Archive’ function within the Data Management menu – it removes the game from the Wii menu but retains the save data.
Prioritize archiving larger games or those you don’t play often. Be mindful that deleting a channel doesn’t erase associated save data, but deleting a game without archiving will remove both. Regularly check your Wii’s memory usage via the System Settings to proactively manage storage. Formatting the SD card can also resolve some issues, but remember to back up any existing data beforehand.
SD Card Issues: Compatibility & Formatting
The Wii supports SD cards up to 32GB, but compatibility isn’t guaranteed for all brands or speeds. SanDisk cards are generally recommended for optimal performance. Formatting is essential; use the Wii’s built-in formatting tool (found in Data Management) for best results – avoid formatting on a computer unless absolutely necessary.
If the Wii doesn’t recognize the SD card, ensure it’s properly inserted and not damaged. Try a different SD card reader if formatting on a computer is required. A corrupted SD card can cause save data loss, so regular backups are vital. Formatting will erase all data, so always back up before proceeding. Avoid quick formatting; a full format is more reliable.
Data Transfer Problems: Wii to SD Card & Vice Versa
Transferring data between the Wii and an SD card can sometimes fail. Common issues include interrupted transfers, corrupted files, or insufficient space. When copying save data, ensure the Wii is powered on and the SD card is correctly inserted. Avoid turning off the console during the transfer process, as this can lead to data corruption.

If a transfer fails, try formatting the SD card again (after backing up any existing data). Large files, like channel data, may take a significant amount of time to transfer. Verify the SD card isn’t full before attempting a transfer. If problems persist, consider using a different SD card or attempting the transfer in smaller batches.

Advanced Troubleshooting & Softmodding
Exploring softmodding with tools like SoftMii Pack unlocks advanced features; understanding homebrew and custom firmware expands Wii capabilities, offering enhanced compatibility.
Softmodding with SoftMii Pack: A Beginner’s Guide
Softmodding your Wii with the SoftMii Pack opens doors to homebrew applications and custom firmware, enhancing functionality beyond the console’s original limitations. Begin with disclaimers – understand the risks involved, as improper modification can potentially brick your system. The SoftMii Pack simplifies the process, offering a user-friendly interface for installing necessary components.
This typically involves backing up your Wii’s NAND memory, a crucial step for recovery if issues arise. Carefully follow the provided instructions, ensuring each step is completed accurately. The pack facilitates installing the Homebrew Channel, a central hub for launching unsigned code. From there, you can explore a vast library of homebrew games, emulators, and system tools. Remember to exercise caution when downloading and installing homebrew, sticking to reputable sources to avoid malware.
Understanding Homebrew & Custom Firmware
Homebrew refers to user-created software for the Wii, extending its capabilities beyond Nintendo’s official offerings. This includes emulators allowing you to play games from other consoles like the N64, PS2, or even 3DS. Custom firmware (CFW) replaces the Wii’s original system software, enabling advanced features and greater control.
CFW is essential for running most homebrew applications, providing the necessary permissions and access. However, installing CFW carries inherent risks, potentially voiding your warranty and, if done incorrectly, bricking your console. Thorough research and careful adherence to instructions are paramount. The benefits include expanded storage options, region-free game playing, and the ability to back up and restore your Wii’s data. Understanding the distinction between homebrew and CFW is crucial for safe and effective Wii modification.
Wii NGC/PS2/3DS/PSP Compatibility & Performance
The Wii’s ability to emulate other consoles is a significant draw for enthusiasts. Utilizing homebrew, the Wii can play Nintendo GameCube (NGC) games natively with excellent compatibility. Emulation of PlayStation 2 (PS2) games is possible, but performance varies significantly depending on the title; some games run flawlessly, while others experience slowdown or graphical glitches.
Emulating 3DS and PSP games is also achievable, though generally requires a more powerful Wii with custom firmware. Performance is often less than ideal, with noticeable lag and graphical imperfections. The Wii’s processing power, originally designed for its own generation, struggles with the demands of more advanced systems. Comparing the Wii to an Xbox reveals the Xbox utilized a more powerful Nvidia GeForce 3-based GPU, offering superior performance. Ultimately, emulation success hinges on the specific game and the Wii’s modified configuration.
WiiU Considerations & Compatibility
The Wii U builds upon the Wii, offering enhanced graphics and backward compatibility; however, performance differs, and Wii accessories function seamlessly with the newer console.
WiiU vs. Wii: Performance & Game Compatibility
The Wii U represents a significant leap in performance compared to the original Wii. While the Wii focused on motion controls and a more casual gaming experience, the Wii U aimed for a high-definition experience, aligning its graphical capabilities with the PlayStation 3 era. The Wii U’s processing power is substantially greater, allowing for more complex games and improved visuals.
Crucially, the Wii U maintains backward compatibility with Wii games and accessories. This means you can enjoy your existing Wii library on the newer console. However, the experience isn’t always identical; some Wii titles may benefit from the Wii U’s enhanced processing, while others will run as they did on the original hardware. The Wii U also introduced a gamepad with a built-in screen, adding a new dimension to gameplay.
Performance comparisons reveal the Wii U’s advantage, but it’s not a direct parallel to more powerful consoles like the Xbox. The Wii U’s architecture and focus on unique gameplay experiences set it apart.
Using Wii Accessories with WiiU
The Wii U offers extensive compatibility with original Wii accessories, enhancing the gaming experience for existing Wii owners. Wii Remotes, Nunchuks, Wii MotionPlus, and even the Wii Balance Board can all be utilized with the Wii U console. This seamless integration allows players to immediately enjoy their favorite Wii games on the new system without needing to repurchase peripherals.
However, some nuances exist. While most accessories connect directly to the Wii U, the console requires an adapter for using multiple Wii Remotes simultaneously. This adapter is necessary because the Wii U has fewer native Wii Remote sensor bars. Furthermore, certain Wii accessories designed for specific games might not function optimally on the Wii U.
The Wii U’s gamepad also introduces new accessory possibilities, but it doesn’t replace the functionality of traditional Wii accessories. Utilizing both simultaneously can create unique gameplay scenarios, blending the classic Wii experience with the Wii U’s innovative features.
WiiU Game Compatibility with Wii Games
The Wii U boasts full backward compatibility with nearly all Wii games, offering a substantial library for new console owners. Players can insert their original Wii discs directly into the Wii U and enjoy their favorite titles, benefiting from the upgraded hardware and display options. This compatibility extends to both physical discs and digitally downloaded WiiWare games transferred via the Wii U Transfer Tool.
However, a few exceptions exist. Certain games relying on specific Wii accessories, like the Wii Speak, might have limited functionality or require alternative solutions on the Wii U. Additionally, online services for some Wii games may no longer be fully supported due to server closures.
The Wii U enhances the Wii gaming experience through improved graphics and the option to display games in HD, providing a visual upgrade for classic titles. This compatibility makes the Wii U a compelling option for those looking to revisit their Wii library.
Maintenance & Long-Term Care
Regular cleaning of the Wii console and peripherals is crucial; preventative measures, like proper ventilation, avoid common issues and ensure lasting enjoyment of your system.
Cleaning the Wii Console & Peripherals
Dust accumulation is a primary concern for Wii longevity. Begin by disconnecting the console from the power source. Use a soft, dry cloth to wipe down the exterior, avoiding abrasive cleaners. For the disc drive area, a gentle compressed air burst can remove debris.
Wii Remotes require careful cleaning. Wipe the remote’s surface with a slightly damp (not wet!) cloth. Pay attention to the sensor bar area and the IR blaster. Avoid getting moisture into any openings. Clean the Nunchuk connector with a dry cotton swab;
Regularly clean the SD card slot with compressed air to prevent connectivity issues. Ensure all peripherals are completely dry before reconnecting. A clean Wii operates more efficiently and reliably, extending its lifespan and enhancing your gaming experience. Remember, preventative care is key!
Preventative Measures to Avoid Common Issues
Proactive maintenance significantly reduces Wii problems. Ensure adequate ventilation around the console to prevent overheating, a common cause of freezes and errors. Regularly check and update the system software for bug fixes and performance improvements. Avoid forceful disc insertion or removal, which can damage the drive.
Proper storage of discs and peripherals is crucial. Keep discs in their cases to prevent scratches and dust accumulation. Store Wii Remotes with batteries removed for extended periods to avoid corrosion. Regularly calibrate the motion sensors for optimal accuracy.
Be mindful of power surges. Utilize a surge protector to safeguard the console from electrical damage. Frequent, gentle cleaning, software updates, and careful handling are your best defenses against common Wii issues, ensuring years of enjoyable gameplay.