Hotpoint Gas Stove Manual: A Comprehensive Guide
Welcome! This manual offers detailed guidance for your Hotpoint gas stove, covering safety, operation, and maintenance. It includes model and serial number location,
and troubleshooting tips for optimal performance and longevity of your appliance.
Understanding Your Hotpoint Gas Stove
Your Hotpoint gas stove is a sophisticated cooking appliance designed for efficiency and reliability. Familiarizing yourself with its components and features will ensure safe and optimal operation. This stove incorporates a robust ignition system and precise temperature controls for consistent cooking results.
Before first use, carefully review the entire manual, paying close attention to the safety precautions outlined within. Understanding the control panel is crucial; it governs burner operation, oven settings, and specialized functions like broiling or self-cleaning (if equipped). The data plate, typically located on the bottom left of the refrigerator compartment or on the appliance itself, provides vital information such as the model number and serial number – essential for identifying your specific stove and accessing appropriate support or replacement parts.
Hotpoint prioritizes customer satisfaction, and this manual serves as a comprehensive resource. Remember the manufacture date is encoded within the serial number. Proper use and maintenance, guided by this manual, will maximize the lifespan and performance of your Hotpoint gas stove.
Safety Precautions
Important: Your Hotpoint gas stove presents potential hazards if not used correctly. Always prioritize safety during operation. Never use the stove for purposes other than cooking, such as heating a room – this creates a serious fire and carbon monoxide risk. Ensure adequate ventilation when the stove is in use, and never leave it unattended while cooking.
Regularly inspect the gas connections for leaks. If you smell gas, immediately follow the instructions detailed in the “Gas Smell – What to Do” section of this manual: evacuate the area, do not operate any electrical switches, and contact your gas company or emergency services.
Keep flammable materials away from burners and the oven. Exercise extreme caution when handling hot cookware and oven racks. Supervise children closely when they are near the stove. Disconnect the gas supply before performing any maintenance or repairs. Hotpoint emphasizes responsible appliance use; adhering to these precautions will prevent accidents and ensure a safe cooking experience.
Important Information & Warnings
Please read carefully: Hotpoint values your safety and satisfaction; This section details crucial information regarding your gas stove’s operation and potential risks. The manufacture date is encoded within the product’s serial number, a vital piece of information for warranty claims and service requests. Locate both the model and serial number on the data plate, typically found on the bottom left side of the appliance.
This stove is designed for household use only. Any modification or improper installation voids the warranty and may create a hazardous situation. Always consult a qualified technician for repairs or adjustments. Be aware that certain parts, like the oven thermostat, may be specific to your model (e.g., 6201440 C00227130).
Hotpoint provides comprehensive documentation, including a detailed parts list for countertop ovens. Refer to these resources for accurate information. Failure to follow these warnings could result in damage to the appliance, personal injury, or property loss. Keep this manual readily accessible for future reference.
Locating the Model and Serial Number
Essential for Service & Warranty: Identifying your Hotpoint gas stove’s model and serial number is crucial for obtaining support, ordering replacement parts, and verifying warranty coverage. This information is prominently displayed on the data plate, a sticker or metal plate affixed to the appliance.
Typically, the data plate is located on the bottom left side of the refrigerator compartment if it’s a combined unit, or directly on the stove frame itself. Look for a label containing details like “Mod.” (model) and “S/N” (serial number). The serial number often includes information related to the date of manufacture, allowing Hotpoint to pinpoint production details.

Record these numbers in a safe place for future reference. When contacting Hotpoint customer support, having this information readily available will expedite the process. Accurate model and serial numbers ensure you receive the correct parts and service recommendations tailored to your specific Hotpoint gas stove. Don’t rely on memory; locate and record these numbers today!
Data Plate Information
Decoding Your Stove’s Identity: The data plate on your Hotpoint gas stove is more than just a label; it’s a comprehensive source of information about your appliance. Beyond the model number (often labeled “Mod.”) and serial number (“S/N”), it contains vital specifications for safe and effective operation.
You’ll find details regarding the gas type the stove is designed for (natural gas or propane), input ratings in BTU (British Thermal Units), and voltage/frequency requirements if the stove includes electrical components like an ignition system or oven light. The data plate also displays the date of manufacture, cleverly encoded within the serial number itself.
This information is essential for technicians performing repairs, ensuring they use compatible parts and adhere to the correct safety procedures. Always refer to the data plate when contacting customer support or ordering replacement components. Understanding the specifications listed on the data plate helps you maintain your Hotpoint gas stove efficiently and safely throughout its lifespan.
Understanding the Control Panel
Navigating Your Stove’s Interface: The control panel is your command center for operating your Hotpoint gas stove. While designs may vary slightly between models, the fundamental principles remain consistent. Typically, you’ll find individual knobs or electronic controls for each burner, allowing precise adjustment of flame height.
For ovens, a separate set of controls manages temperature settings and cooking functions like bake, broil, and potentially self-clean. Digital displays, if present, provide clear readouts of selected temperatures and timer durations. Some models feature pre-programmed cooking cycles for common dishes, simplifying meal preparation.
Familiarize yourself with the symbols and markings on each control. Understand the difference between “off,” “low,” “medium,” and “high” settings for both burners and the oven. Refer to the detailed diagrams in this manual for a specific overview of your stove’s control panel layout and features. Differences in images and features may exist between models.
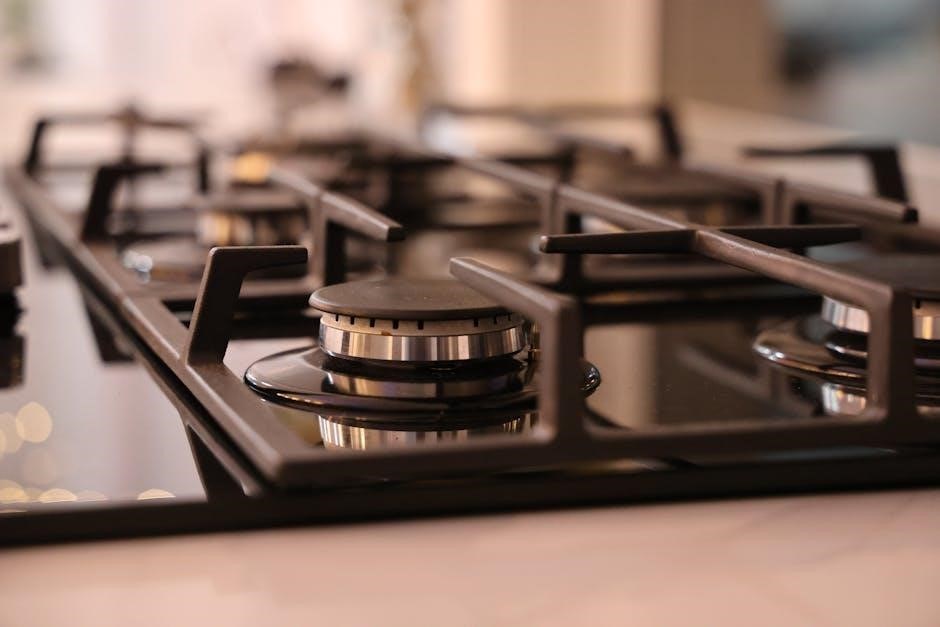
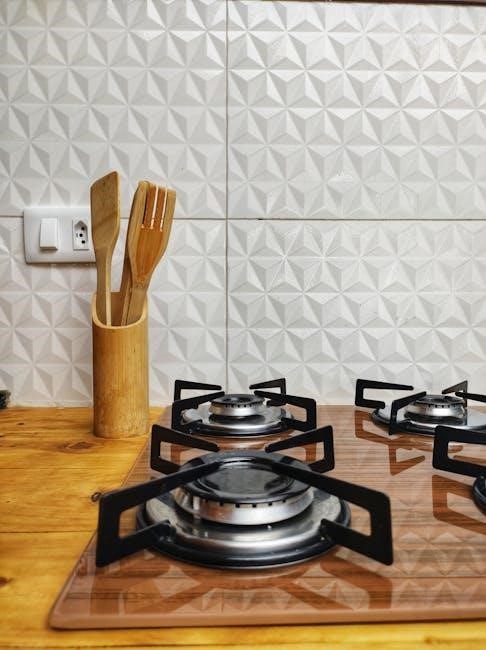
Gas Stove Components Overview
Key Parts of Your Hotpoint Gas Stove: Your gas stove comprises several essential components working in harmony. The burners, located on the cooktop, deliver the flame for heating cookware. Each burner consists of a burner cap, burner head, and gas orifice. Beneath the cooktop lies the gas supply line, connecting to the main gas source.
The ignition system, either electronic or with a pilot light, initiates the gas flow and creates a flame. The control panel, as previously discussed, allows you to regulate gas flow to each burner and control oven functions. The oven itself features heating elements, racks for supporting cookware, and potentially a self-cleaning function.
Furthermore, the oven door provides access and insulation, while the data plate, typically found on the bottom left side, displays crucial information like the model and serial number. Understanding these components is vital for safe operation, effective cleaning, and troubleshooting any potential issues. Regular inspection of these parts ensures optimal performance.
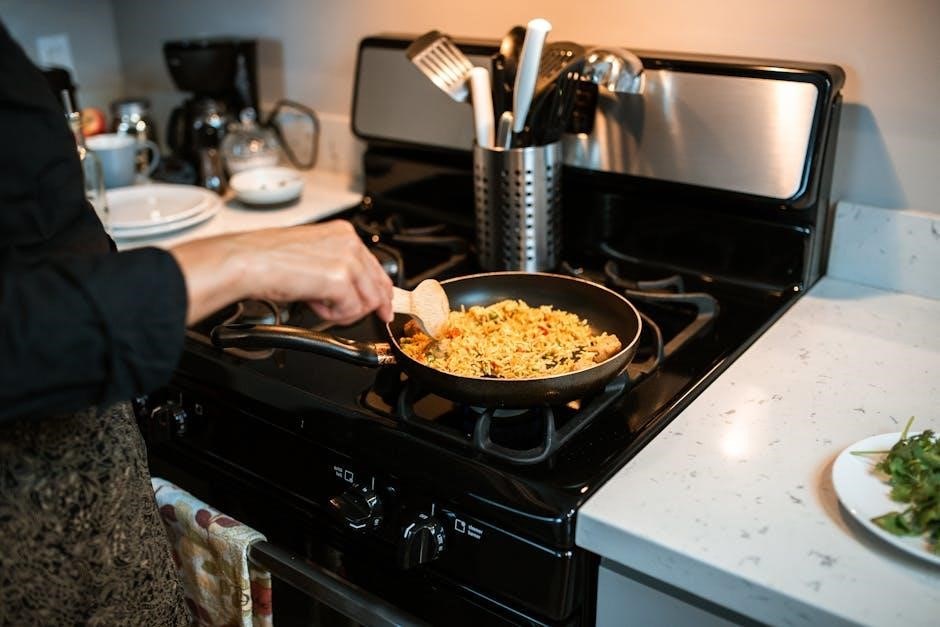
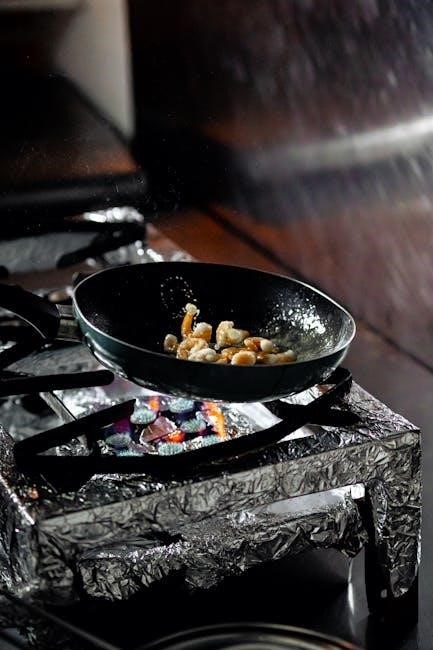
Burner Operation
Using Your Hotpoint Gas Burners: To operate a burner, first ensure the control knob corresponding to that burner is in the “OFF” position. Then, push and turn the knob counterclockwise to the “LITE” or “HIGH” setting. Simultaneously, activate the ignition system – either by pressing an igniter button or using a built-in spark igniter. A consistent flame should appear.
Once lit, continue holding the knob for a few seconds, then release. If the flame extinguishes, repeat the lighting process. Adjust the flame height by turning the knob between “HIGH” and “LOW” to achieve the desired cooking temperature. Always ensure a stable, blue flame; a yellow or flickering flame indicates incomplete combustion and requires attention.
Important Considerations: Never leave a burner unattended while lit. Ensure proper ventilation while cooking. Regularly inspect burner ports for clogs and clean as needed. Different burners may have varying BTU ratings, influencing heating speed. Familiarize yourself with each burner’s capabilities for optimal cooking results.
Ignition System Explained
Understanding Your Hotpoint Ignition: Hotpoint gas stoves typically employ either electronic ignition or a pilotless ignition system. Electronic ignition utilizes a spark module to create a spark at the burner port when the control knob is activated. This spark ignites the gas flow, creating a flame. Pilotless ignition systems similarly use a spark, eliminating the need for a constantly burning pilot light.
How it Works: When you turn the control knob, gas flows to the burner. Simultaneously, the ignition module sends an electrical signal to the igniter, generating a spark. The spark ignites the gas-air mixture. If the flame doesn’t ignite within a certain timeframe, many models feature a safety shut-off mechanism that cuts off the gas supply.

Troubleshooting: If the ignition fails, check the power supply to the stove (for electronic ignition). Ensure the burner ports are clean and unobstructed. A clicking sound indicates the igniter is working, but gas may not be reaching the burner; If issues persist, consult the troubleshooting section or contact Hotpoint customer support.
Adjusting Flame Height
Controlling Your Cooktop’s Heat: Your Hotpoint gas stove’s flame height is easily adjustable using the control knobs located on the control panel. These knobs regulate the amount of gas flowing to each burner, directly impacting the flame size and cooking temperature.
Proper Adjustment Techniques: To increase the flame, turn the knob clockwise. To decrease it, turn counterclockwise. Start with a lower flame setting and gradually increase it until you achieve the desired cooking temperature. Avoid excessively high flames, as they can waste energy and potentially damage cookware.
Optimal Flame Characteristics: A properly adjusted flame should be blue with a clearly defined inner cone. Yellow or orange flames indicate incomplete combustion and may produce soot. If you observe this, ensure the burner ports are clean. Consistent flame control is crucial for even cooking and efficient energy use. Always refer to recipes for recommended flame settings.
Cleaning the Burner Caps
Maintaining Burner Performance: Regularly cleaning your Hotpoint gas stove’s burner caps is essential for optimal performance and efficient cooking. Food spills and residue can clog the burner ports, leading to uneven flames and reduced heating efficiency. This process ensures consistent heat distribution and prevents potential gas buildup.
Cleaning Procedure: First, ensure the stove is turned off and completely cool. Remove the burner caps and burner heads. Wash them in warm, soapy water using a non-abrasive sponge or cloth. For stubborn residue, soak them for 15-20 minutes. Rinse thoroughly and allow to dry completely before reassembling.
Unclogging Burner Ports: If burner ports are clogged, use a thin wire or needle to gently clear any obstructions. Never use toothpicks, as they can break off and worsen the blockage. Ensure all ports are clear for even gas flow. Reassemble the burner heads and caps, ensuring they are properly seated. A clean burner cap contributes to a safe and efficient cooking experience.
Cleaning the Stove Top
Maintaining a Pristine Surface: Regularly cleaning your Hotpoint gas stove’s stovetop is crucial for both aesthetics and hygiene. Spills and splatters can bake onto the surface, becoming difficult to remove and potentially affecting future cooking performance. Consistent cleaning prevents buildup and maintains a safe cooking environment.
Cleaning Procedure: Begin by ensuring the stovetop is cool to the touch. Remove any loose debris with a soft cloth or brush. For everyday cleaning, use warm, soapy water and a non-abrasive sponge. For tougher, baked-on messes, create a paste of baking soda and water, apply it to the stain, and let it sit for 15-20 minutes before gently scrubbing.
Specialized Cleaners: Avoid abrasive cleaners or scouring pads, as they can scratch the surface. For stainless steel stovetops, use a stainless steel cleaner and polish. Always rinse thoroughly with clean water and dry with a soft cloth to prevent water spots. A clean stovetop enhances the appearance and functionality of your Hotpoint gas stove.
Oven Operation Basics
Getting Started with Baking & Roasting: Your Hotpoint gas stove’s oven offers versatile cooking capabilities. Before first use, it’s recommended to run a self-clean cycle (if equipped) to eliminate any manufacturing residue. Familiarize yourself with the control panel, specifically the temperature settings and cooking modes – Bake, Broil, and potentially others like Convection.
Preheating the Oven: Always preheat the oven to the desired temperature before placing food inside. This ensures even cooking and optimal results. The oven will typically signal when it has reached the set temperature. Allow sufficient preheating time, usually 10-15 minutes, depending on the temperature.
Selecting Cooking Modes: The ‘Bake’ mode is ideal for most baking and roasting tasks. ‘Broil’ uses high heat from the top element, perfect for browning or quickly cooking foods. Refer to your recipe for the appropriate temperature and cooking time. Proper oven operation guarantees delicious and consistently cooked meals.
Oven Temperature Control
Precise Temperature Settings: Your Hotpoint gas stove’s oven temperature is controlled via a dial or electronic controls on the control panel. Ensure the oven is properly calibrated for accurate cooking. Temperature ranges typically span from a low warming setting to high heat for broiling. Always verify the selected temperature before starting.
Understanding Temperature Variations: Slight temperature variations are normal in gas ovens. For consistent results, use an oven thermometer to verify the internal temperature, especially for baking delicate items. Adjust cooking times accordingly if necessary. Accurate temperature control is crucial for successful recipes.
Adjusting Temperature During Cooking: Avoid frequently opening the oven door during cooking, as this releases heat and affects the temperature. If a recipe requires a temperature adjustment mid-cycle, make small changes and allow the oven to stabilize before continuing. Consistent temperature management leads to perfectly cooked dishes.
Using Oven Racks
Optimizing Rack Placement: Your Hotpoint gas stove’s oven racks are designed for versatile cooking. For baking, position the rack in the center of the oven for even heat distribution. When baking multiple items simultaneously, utilize two racks, staggering the placement for optimal airflow. Adjust rack positions based on the recipe’s instructions.
Broiling and Rack Height: For broiling, position the rack closer to the broiler element for intense, direct heat. Monitor food closely during broiling to prevent burning. Lower rack positions are suitable for slower cooking or roasting. Always use the appropriate rack position for the desired cooking method.
Rack Safety and Maintenance: Ensure the oven racks are securely placed in the rack supports before use. Avoid overloading the racks with excessive weight. Regularly clean the racks to remove food debris and maintain optimal oven performance. Proper rack usage enhances cooking efficiency and safety.
Self-Cleaning Oven Function
Initiating the Self-Clean Cycle: Your Hotpoint gas stove features a self-cleaning oven function for convenient maintenance. Before starting, remove all racks, cookware, and any loose debris from the oven interior. Ensure the oven door can lock securely. Select the self-clean cycle on the control panel, choosing the desired cleaning duration – typically ranging from 2 to 4 hours.
Safety Precautions During Self-Cleaning: During the self-clean cycle, the oven reaches extremely high temperatures. Avoid opening the oven door until the cycle is complete and the oven has cooled down. Keep children and pets away from the oven during operation. A slight odor may be noticeable during the process, which is normal.
Post-Cycle Cleaning: Once the cycle finishes and the oven cools, wipe away any remaining ash with a damp cloth. Do not use abrasive cleaners, as they can damage the oven’s interior. Regular use of the self-cleaning function minimizes manual cleaning efforts and maintains optimal oven performance.
Broiling Instructions
Preparing to Broil: To broil effectively with your Hotpoint gas stove, position the oven rack appropriately – typically in the highest slot for closer heat, or a lower slot for slower cooking. Preheat the broiler for approximately 5-10 minutes, ensuring the indicator light signals readiness. Always use broiling pans designed to withstand high temperatures, and line them with foil for easier cleanup.
Broiling Food Safely: Place food on the broiling pan, leaving space around the edges for even cooking. Monitor the food closely during broiling, as it cooks rapidly. Turn food halfway through the broiling time to ensure both sides are evenly browned. Avoid overcrowding the pan, as this can lead to steaming instead of browning.
Important Considerations: Never broil with the oven door open, as this poses a safety hazard. Be cautious of flare-ups from dripping fats, and adjust the oven rack position if necessary. After broiling, allow the oven to cool before cleaning the broiling pan and any splatters.
Troubleshooting Common Issues
Ignition Problems: If your Hotpoint gas stove fails to ignite, first ensure the gas supply is turned on. Check the igniter for debris or blockage, and clean if necessary. A clicking sound without ignition may indicate a faulty igniter, requiring professional repair. If using a pilot light model, verify the pilot flame is lit and stable.
Uneven Baking: Uneven baking can often be resolved by ensuring oven racks are properly positioned and not overcrowded. Verify the oven temperature is accurately set, and allow sufficient preheating time. Rotate the baking dish halfway through the cooking process for more consistent results.
Gas Smell: If you detect a gas smell, immediately extinguish any open flames, do not operate any electrical switches, and open windows for ventilation. Evacuate the area and contact your gas company or emergency services from a safe location. Do not attempt to locate the source of the leak yourself.
Gas Smell – What to Do
Safety First! If you suspect a gas leak, your immediate safety is paramount. Do not operate any electrical switches – this includes lights, appliances, or even your phone – as a spark could ignite the gas. Avoid creating any open flames, such as lighting a match or using a lighter.
Immediate Actions: Extinguish all open flames and sources of ignition. Open windows and doors to thoroughly ventilate the area, allowing the gas to dissipate. Evacuate everyone from the building immediately, ensuring pets are also removed to a safe distance.
Contact Professionals: Once safely outside, contact your local gas company or the emergency services (911 or your local equivalent) from a neighbor’s house or a mobile phone away from the affected building. Do not re-enter the premises until authorized by qualified professionals who have confirmed it is safe. Do not attempt to locate the source of the leak yourself.
Ignition Problems
Troubleshooting Ignition: If your Hotpoint gas stove fails to ignite, several factors could be at play. First, ensure the gas supply is turned on at the source. Check that the burner caps are correctly positioned and clean – food debris can obstruct the gas flow and prevent ignition.
Spark Ignition Check: Verify the igniter is producing a spark when the knob is turned. If no spark is visible, the igniter itself may be faulty and require replacement. A weak or intermittent spark can also indicate a problem with the igniter module or wiring.
Cleaning & Resetting: Clean around the burner ports with a small wire or pin to remove any blockages. Some models have a reset button for the ignition system; consult your specific model’s documentation for its location and procedure. If problems persist after these checks, contact a qualified appliance repair technician for assistance. Do not attempt repairs yourself if you are not comfortable working with gas appliances.
Uneven Baking
Addressing Uneven Baking: Experiencing unevenly baked goods with your Hotpoint gas stove’s oven is a common concern. Several factors can contribute to this issue, starting with improper oven rack positioning. Ensure racks are level and not overcrowded, allowing for adequate heat circulation.
Temperature Calibration: Verify the oven temperature is accurate using an oven thermometer. Gas ovens can sometimes require calibration; consult your model’s manual for instructions on how to adjust the temperature setting. Consistent temperature is crucial for even baking.
Heat Distribution: Rotate baking pans halfway through the baking cycle to promote even browning. Avoid opening the oven door frequently during baking, as this releases heat and disrupts the baking process. Also, check the door seal for any damage that might cause heat loss. If issues continue, a professional appliance technician should inspect the oven’s heating elements and thermostat.

Cleaning the Oven Door
Maintaining a Clean Oven Door: Regularly cleaning your Hotpoint gas stove’s oven door is essential for both appearance and performance. Begin by ensuring the oven is cool. For light cleaning, a solution of warm water and mild dish soap applied with a soft cloth is usually sufficient. Gently wipe down the glass surface, avoiding abrasive cleaners that can cause scratches.
Removing Stubborn Stains: For baked-on food or grease, create a paste of baking soda and water. Apply this paste to the affected areas, let it sit for 15-20 minutes, and then gently scrub with a non-abrasive sponge. Rinse thoroughly with clean water and dry with a soft cloth.
Door Removal (If Applicable): Some Hotpoint models allow for door removal for easier cleaning. Consult your owner’s manual for specific instructions on how to safely remove and reattach the door. Always handle the door with care, as it can be heavy. Avoid spraying cleaning solutions directly onto the door’s heating elements or seals.
Replacing Oven Light Bulb
Ensuring Visibility: A functioning oven light is crucial for monitoring your cooking progress. If your Hotpoint gas stove’s oven light burns out, replacing it is a straightforward process. Safety First: Always disconnect the power to the stove at the circuit breaker before attempting any repairs.
Locating the Bulb: The oven light is typically located inside the oven cavity, often at the rear or side. Accessing it may require removing a small cover or panel. Consult your owner’s manual for the exact location and removal instructions specific to your model.
Bulb Replacement: Once accessed, carefully unscrew the old bulb. Note the bulb type (wattage and base) and purchase a replacement with the same specifications. Screw in the new bulb securely, but do not overtighten. Reattach any covers or panels removed. Restore power to the stove and test the new bulb. Caution: Allow the bulb to cool completely before handling.
Finding Replacement Parts
Maintaining Your Stove: Over time, components of your Hotpoint gas stove may require replacement due to wear and tear. Sourcing the correct parts is essential for ensuring continued safe and efficient operation. Authorized Retailers: The most reliable source for genuine Hotpoint replacement parts is through authorized Hotpoint retailers or service centers.
Online Resources: Numerous online appliance parts retailers specialize in Hotpoint components. When ordering online, always verify the part number against your stove’s model and serial number – found on the data plate – to guarantee compatibility. Be cautious of non-authorized sellers offering potentially incompatible or substandard parts.
Part Numbers are Key: Having the correct part number significantly simplifies the search process. Your owner’s manual often lists common replacement parts and their corresponding numbers. Professional Assistance: If you’re unsure about identifying the correct part or performing the replacement yourself, consult a qualified appliance repair technician.
Hotpoint Customer Support Contact Information
Need Assistance? Hotpoint provides several avenues for customer support should you encounter issues with your gas stove or require assistance with its operation. Online Support: Visit the official Hotpoint website for a comprehensive FAQ section, troubleshooting guides, and downloadable manuals. Many common questions are addressed in these online resources, offering immediate solutions.
Phone Support: For direct assistance, you can contact Hotpoint’s customer support team via phone. The specific number may vary depending on your region, so consult the Hotpoint website for the most accurate contact details. Be prepared to provide your stove’s model and serial number when calling.
Service Request: If your stove requires repair, you can submit a service request through the Hotpoint website. This will connect you with a local authorized service technician. Social Media: Hotpoint also maintains a presence on various social media platforms, where you can often find helpful information and connect with other users.