
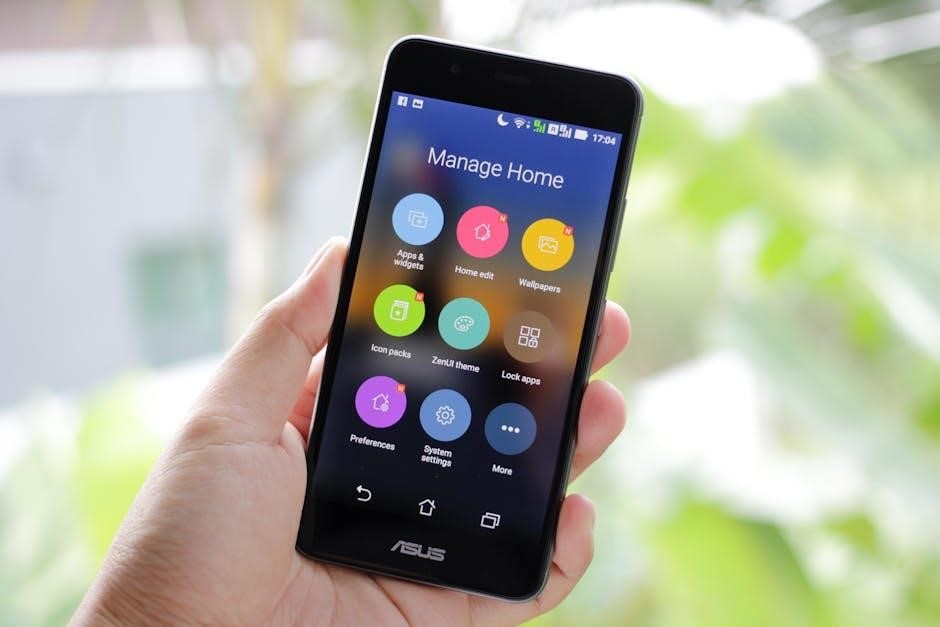
The Honeywell TH6110D1005 is a programmable digital thermostat, offering users enhanced control over their home’s heating and cooling systems.
This guide, derived from available manuals and resources published as recently as February 3, 2023, and February 16, 2026, will help you understand its features.
What is the Honeywell TH6110D1005?
The Honeywell TH6110D1005 is a member of the FocusPRO 6000 Series of programmable digital thermostats. It’s designed to provide precise temperature control and energy savings within your home environment. This thermostat is widely recognized for its user-friendly interface and reliable performance, as detailed in numerous online manuals and guides available on platforms like ManualsLib and thermostat.guide.
Specifically, it’s a programmable thermostat, allowing users to set customized heating and cooling schedules to match their lifestyles. Information sourced from February 3, 2023, and updated as recently as February 16, 2026, confirms its compatibility with various heating and cooling systems. The TH6110D1005 aims to offer a balance between functionality, ease of use, and cost-effectiveness, making it a popular choice for residential applications. Installation instructions are readily available for proper setup.
Key Features and Benefits
The Honeywell TH6110D1005 boasts several key features enhancing home comfort and energy efficiency. Programmable schedules, a core benefit, allow customized temperature settings for different times of day and days of the week, reducing energy waste. Its user-friendly interface, highlighted in available manuals from sources like thermostat.guide and ManualsLib, simplifies operation and programming.
The thermostat supports multiple system types, offering versatility for various home configurations. Precise temperature control ensures consistent comfort, while compatibility with Honeywell Home systems expands functionality. Resources dated February 3, 2023, and updated to February 16, 2026, emphasize its reliability. Benefits include reduced energy bills, improved comfort, and convenient control over your home’s climate, all accessible through a straightforward design.
Package Contents
Upon opening the Honeywell TH6110D1005 package, you should find several essential components. The core item is, of course, the programmable digital thermostat itself, designed for wall mounting. Included is a mounting baseplate, crucial for secure installation and wiring connections, as detailed in installation instructions available online.
You’ll also receive a set of mounting screws and wall anchors to ensure a stable and lasting setup. A detailed user manual, referenced in resources from ManualsLib and thermostat.guide (updated as recently as February 16, 2026), provides step-by-step guidance. Wire labels are included to aid in proper wiring identification. Finally, installation instructions are provided, ensuring a smooth and successful setup process, allowing you to quickly enjoy the thermostat’s benefits.
Safety Precautions
Before installation, always disconnect power to your HVAC system to avoid electrical shock; read all instructions carefully for safe operation.
Electrical Safety Warnings
Crucially, disconnect power at the breaker or fuse box before beginning any wiring or installation procedures. Failure to do so presents a significant risk of electrical shock, potentially causing severe injury or even death.
Ensure hands are dry when handling wiring or the thermostat itself. Never work with a wet environment, as water dramatically increases the risk of electrical hazards.
Inspect all wiring for damage before connecting it to the thermostat. Replace any frayed or damaged wires immediately.
If you are uncomfortable working with electrical wiring, consult a qualified HVAC technician for assistance. Do not attempt repairs or installations beyond your skill level.
Always adhere to local electrical codes and regulations during installation. Improper wiring can create fire hazards and void the thermostat’s warranty.
General Safety Guidelines
Prior to installation, carefully read and understand all instructions provided within this manual and any accompanying documentation. Familiarization minimizes errors and ensures safe operation.
Keep this manual readily accessible for future reference, troubleshooting, or when performing maintenance on the thermostat. It contains vital information for optimal performance.
Exercise caution when mounting the thermostat, ensuring it is securely fastened to the wall. A loose thermostat could fall, causing damage or injury.
Avoid exposing the thermostat to extreme temperatures, humidity, or direct sunlight. These conditions can affect its accuracy and lifespan.
Do not attempt to disassemble or modify the thermostat in any way. This will void the warranty and could create a safety hazard. Use only as intended.

Thermostat Components & Overview
The Honeywell TH6110D1005 features a display, buttons for control, a terminal block for wiring, and a backplate for secure mounting, as detailed in guides.
Display and Buttons Explained
The Honeywell TH6110D1005’s display provides crucial information, including the current temperature, setpoint temperature, operating mode (heat, cool, auto, off), and time. Icons indicate system status, like fan operation or heating/cooling activation. The display’s brightness may be adjustable, enhancing visibility in various lighting conditions;
Button functionality is straightforward. Typically, “Up” and “Down” buttons adjust the setpoint temperature. A “Mode” button cycles through heating, cooling, and auto settings. A “Fan” button controls fan operation (auto, on). “Hold” temporarily overrides programmed schedules, maintaining a constant temperature. The “Menu” button accesses advanced settings and programming options. Refer to the owner’s guide for specific button combinations and their corresponding actions, ensuring optimal thermostat control and understanding of its features.
Terminal Block Identification
The TH6110D1005’s terminal block facilitates connections to your HVAC system. Common terminals include ‘R’ for 24VAC power, ‘C’ for the common wire (essential for consistent power), ‘W’ for heating, ‘Y’ for cooling, and ‘G’ for the fan. Additional terminals may exist for auxiliary heat (‘AUX’ or ‘E’) or reversing valves in heat pump systems (‘O/B’).
Proper identification is crucial for correct wiring. Incorrect connections can damage the thermostat or your HVAC equipment. Always consult your system’s wiring diagram and the thermostat’s installation instructions. Carefully label wires before disconnecting the old thermostat. The terminal block’s markings are typically embossed or printed directly onto the block itself. Double-check all connections before powering on the system, ensuring a secure and reliable connection for optimal performance.
Backplate and Wiring Connections
The thermostat backplate serves as the mounting point and connection hub for the wiring. Securely attach the backplate to the wall using the provided screws, ensuring it’s level for accurate display. Before connecting wires, always turn off power to your HVAC system at the breaker.
Wiring connections are made by inserting stripped wire ends into the corresponding terminals on the backplate. Ensure wires are firmly seated and no bare wire is exposed. Refer to the terminal block identification section for correct wire placement (R, C, W, Y, G, etc.). Gently tug on each wire to confirm a secure connection. Once all wires are connected, carefully tuck them into the wall opening before attaching the thermostat body to the backplate.
Installation Guide
Proper installation is crucial for optimal performance. This section details preparing for installation, wiring the thermostat, and securely mounting it to the wall.
Preparing for Installation
Before beginning the installation process, ensure your heating and cooling system is completely powered off at the breaker box to avoid electrical shock. Carefully remove your existing thermostat’s cover, noting the wiring configuration – it’s highly recommended to photograph the existing wiring for future reference.
Identify each wire and its corresponding terminal. The FocusPRO 6000 Series installation instructions emphasize reading these instructions before proceeding. Verify compatibility with your system; the TH6110D is designed for standard heating and cooling systems.
Gather necessary tools, including a screwdriver, wire strippers, and potentially a level to ensure straight mounting. Confirm you have the correct backplate for your wall type and sufficient space around the installation location, free from obstructions.
Wiring the Thermostat (Detailed Steps)
Following the photograph taken during removal, carefully disconnect the wires from the old thermostat, labeling each one if necessary. Refer to the TH6110D1005 wiring diagram – typically found within the installation instructions – to connect each wire to the corresponding terminal on the thermostat’s backplate.
Common terminals include Rh and Rc (power), W (heat), Y (cool), and G (fan); Ensure wires are securely fastened to the terminals; loose connections can cause malfunctions.
If you have a common wire (C), connect it to the ‘C’ terminal; this is crucial for consistent power; Double-check all connections against your wiring diagram before proceeding. The FocusPRO series instructions stress careful wiring for optimal performance.
Mounting the Thermostat
After wiring is complete and verified, carefully align the thermostat baseplate with the previously marked screw holes on the wall. Use the provided screws to securely attach the baseplate to the wall, ensuring it is level for accurate display and operation.
Avoid overtightening the screws, as this could damage the wall or the baseplate. Once the baseplate is firmly mounted, gently snap the thermostat body onto the baseplate until it clicks into place.
Verify a secure connection. The FocusPRO installation instructions emphasize a stable mount to prevent dislodging and maintain reliable performance. A properly mounted thermostat is essential for long-term functionality.
Initial Setup & Programming
Upon powering on, the Honeywell TH6110D1005 requires initial configuration, including setting the correct date, time, and programming personalized heating/cooling schedules.
Powering On and Initial Configuration
After installation, the Honeywell TH6110D1005 thermostat will prompt you through an initial setup process upon powering on. The display will guide you, typically beginning with a language selection. Following this, the thermostat will request the current date and time. Accurate input here is crucial for proper scheduling functionality.
During configuration, you may be asked to specify your system type – whether you have conventional heating and cooling, a heat pump, or another configuration. Selecting the correct system type ensures optimal performance and prevents incorrect operation. The thermostat may also ask about wiring details, confirming the connections made during installation.
Pay close attention to each screen and follow the on-screen instructions carefully. Incorrect settings during this initial phase can lead to operational issues later on. Refer to the full owner’s guide for detailed explanations of each setting and potential troubleshooting steps.
Setting the Date and Time

Accurate date and time settings are fundamental for the Honeywell TH6110D1005’s scheduling capabilities. To adjust these, navigate through the thermostat’s menu system using the buttons. Typically, you’ll find the date and time settings within a “Setup” or “Configuration” menu.
Use the up and down arrow buttons to modify the month, day, and year, confirming each selection. Similarly, adjust the hour and minute. Ensure you correctly identify AM or PM settings to avoid time discrepancies. The thermostat’s display will clearly show the values being adjusted.
Properly configured date and time are essential for the thermostat to execute programmed schedules correctly. Incorrect settings will result in heating or cooling activating at unintended times. Double-check your entries before saving, as some models may require a confirmation step to finalize the changes.
Programming Heating and Cooling Schedules
The Honeywell TH6110D1005 excels in energy management through programmable schedules. Access the programming mode via the thermostat’s menu, often labeled “Schedule” or “Program.” You can typically set different temperatures for various periods throughout the day – wake, leave, return, and sleep – tailoring comfort to your routine.
Separate schedules can be created for weekdays and weekends, offering flexibility. Within each period, define the desired temperature for heating and cooling. The thermostat supports multiple program periods, allowing granular control. Remember to save each program after making adjustments;
Review your programmed schedule regularly to ensure it aligns with your lifestyle and maximizes energy savings. The user manual provides detailed instructions on navigating the scheduling interface and customizing settings.

Operating the Thermostat
The Honeywell TH6110D1005 offers intuitive operation, displaying vital information with clear icons and allowing easy adjustments to temperature and fan settings.
Understanding the Display Icons
The Honeywell TH6110D1005 utilizes a variety of display icons to communicate the current thermostat status and system operation. A flame icon indicates the heating system is actively running, providing warmth to your home. Conversely, a snowflake icon signifies the cooling system is engaged, lowering the temperature.
A fan icon displays the fan’s operational mode – ‘Auto’ means the fan runs only during heating or cooling, while ‘On’ indicates continuous fan operation. Battery indicators alert you to low battery levels, prompting replacement. A Wi-Fi symbol confirms a successful connection to your home network, enabling remote control features (if applicable to your model).
Other icons may represent system settings, programming modes, or error conditions. Refer to the complete owner’s guide, available online as of February 3, 2023, for a comprehensive explanation of each icon and its corresponding meaning. Understanding these icons is crucial for effectively managing your home’s comfort and energy usage.
Manual Operation: Overriding the Schedule
The Honeywell TH6110D1005 allows for temporary overrides of the programmed heating and cooling schedule. To manually adjust the temperature, use the up or down arrow buttons on the thermostat’s face. This will set a ‘hold’ temperature, maintaining that setting until the next scheduled program change or until you manually release the hold.
The duration of the hold can often be customized – options typically include a temporary hold lasting until the next schedule change, or a permanent hold that overrides the schedule indefinitely. The display will usually indicate when a hold is active.
Releasing the hold returns the thermostat to its regularly programmed schedule. Refer to the owner’s guide, updated as recently as February 3, 2023, for specific instructions on initiating and releasing holds, as procedures may vary slightly depending on your specific model configuration. This feature provides convenient, on-demand comfort control.
Fan Control Settings
The Honeywell TH6110D1005 offers several fan control options to enhance comfort and air circulation. Users can typically select from ‘Auto’, ‘On’, and potentially ‘Circulate’ modes. In ‘Auto’ mode, the fan operates only during heating or cooling cycles, optimizing energy efficiency. Selecting ‘On’ keeps the fan running continuously, providing consistent air movement throughout the home.
A ‘Circulate’ setting, if available, intermittently runs the fan to maintain even temperature distribution without constant energy consumption. Accessing these settings usually involves navigating the thermostat’s menu using the control buttons.
The display will indicate the currently selected fan mode. Refer to the owner’s guide, with updates available as recently as February 3, 2023, for detailed instructions on adjusting fan settings and understanding their impact on your home’s climate control. Proper fan control contributes to overall comfort and energy savings.
Troubleshooting Common Issues
Common problems with the TH6110D1005 include power failures, inaccurate temperature readings, and communication errors; solutions are detailed in the user manual.
Thermostat Not Powering On
If your Honeywell TH6110D1005 thermostat fails to power on, several potential causes should be investigated. First, verify the power supply at the furnace or HVAC system is active; a blown fuse or tripped circuit breaker could be the culprit. Carefully inspect the wiring connections at both the thermostat and the furnace terminal block, ensuring they are secure and correctly placed – referencing the installation instructions is crucial.
Confirm the thermostat’s batteries (if applicable, some models utilize batteries as a backup or primary power source) are fresh and properly installed. A faulty transformer can also prevent power delivery; testing the transformer’s output voltage with a multimeter is recommended for experienced users. If the issue persists after checking these components, consult a qualified HVAC technician to diagnose potential problems within the heating or cooling system itself, as a system malfunction could be preventing power from reaching the thermostat.
Incorrect Temperature Readings
Experiencing inaccurate temperature readings on your Honeywell TH6110D1005 thermostat can stem from several factors. Ensure the thermostat isn’t directly exposed to sunlight, drafts, or heat-generating appliances, as these can skew the sensor’s readings. Verify the thermostat is mounted on an interior wall, away from exterior doors or windows.
Check for obstructions blocking airflow around the thermostat; furniture or curtains can impact accuracy. If the issue persists, attempt a thermostat reset – consult the user manual for specific reset procedures. Calibration features, if available on your model, allow for minor temperature adjustments. If significant discrepancies remain, a faulty temperature sensor within the thermostat may require professional repair or replacement. Consider comparing the thermostat’s reading with a reliable, calibrated thermometer.

Communication Errors
If your Honeywell TH6110D1005 thermostat displays communication errors, it typically indicates a problem with the connection to the heating or cooling system. First, verify the wiring connections at both the thermostat and the furnace/air handler, ensuring all wires are securely fastened to their respective terminals. Check the system’s power supply; a low battery or tripped breaker can disrupt communication.
For systems utilizing a common wire (C-wire), confirm it’s properly connected, as this is crucial for consistent communication. If the issue persists, consult the installation instructions to confirm correct wiring configurations. In some cases, interference from other electronic devices might cause communication disruptions. A system reset, following the manual’s guidance, can sometimes resolve these errors; If problems continue, professional HVAC assistance is recommended.