
Intertek Heater Manual: A Comprehensive Guide
This manual provides detailed instructions for Intertek heaters, covering safety, operation, maintenance, and troubleshooting. It assists users in maximizing heater performance and longevity.
Understanding Your Intertek Heater
Intertek heaters are designed for safe and efficient heating, utilizing various technologies like ceramic or infrared. Familiarizing yourself with your specific model is crucial for optimal performance. This involves identifying key components, understanding control panel functions, and adhering to safety guidelines. Proper usage extends the heater’s lifespan and ensures user well-being.
Knowing the heater’s features and specifications, such as wattage and voltage, is also essential. Refer to the manual for detailed information regarding your heater’s capabilities and limitations. Always prioritize safety when operating any heating appliance.
Identifying Your Heater Model
Accurately identifying your Intertek heater model is the first step towards accessing specific support and documentation. The model number and serial number are vital pieces of information. Locating these identifiers enables you to determine the heater’s age, warranty status, and compatible accessories. These numbers are typically found on a label affixed to the heater’s housing.
Refer to the manual or Intertek’s website for guidance on locating these numbers on your particular model. Having this information readily available streamlines troubleshooting and warranty claims.
Locating the Model Number

The Intertek heater model number is a unique identifier crucial for accessing specific product information. Typically, this alphanumeric code is printed on a sticker or directly on the heater’s base, rear panel, or inside the battery compartment (if applicable). Carefully inspect these areas, as the label’s placement can vary depending on the heater type.
The model number often begins with letters followed by numbers, like CAPF3743C6DB. Record this number accurately, as even a single incorrect digit can hinder support requests.
Finding the Serial Number
The serial number is another vital identifier, often located near the model number on the heater’s label. It’s a unique sequence of characters used for tracking manufacturing details and warranty information. Examine the heater’s base, rear panel, or within the battery compartment for a sticker containing this number.
Unlike the model number, the serial number is typically a longer string of numbers and/or letters. Carefully note this number alongside the model number for future reference and potential warranty claims.
Decoding the Serial Number for Age Determination
Determining your Intertek heater’s age can be useful for warranty purposes or understanding its lifespan. While not always straightforward, the serial number often contains coded information about the manufacturing date. Refer to online resources like the Building Intelligence Center, which provides guides for decoding serial numbers of various HVAC brands.
Intertek utilizes specific manufacturing date codes embedded within the serial number. These codes require careful interpretation, and online tools can assist in translating them into a specific year or month of production.
Using Online Resources for Date of Manufacture
Several online resources can aid in determining your Intertek heater’s manufacture date. The Building Intelligence Center is a valuable starting point, offering indexed lists of brands and decoding guides. Barcode Spider can provide product details when you input the UPC code (e;g., 891101002341, 670045150673, 600150489078).
Additionally, articles like “How do I determine the age of my air conditioner?” offer guidance on decoding serial numbers, a technique applicable to some Intertek models. Remember to have your heater’s serial number readily available.
Intertek’s Manufacturing Date Codes
Unfortunately, publicly available detailed information regarding Intertek’s specific manufacturing date codes is limited. Unlike some brands, Intertek doesn’t widely publish a direct translation key for their serial numbers. However, utilizing resources like the Building Intelligence Center, alongside the serial number, can offer clues.
Decoding often requires cross-referencing with known model release dates and available product information. Expert assistance may be needed for precise age determination, as the codes aren’t universally decipherable.
Safety Precautions
Prioritize safety when operating your Intertek heater. Always ensure proper ventilation and keep flammable materials at least three feet away. Never leave the heater unattended, especially around children or pets. Inspect the power cord regularly for damage, and avoid using extension cords.
Electrical safety is paramount; ensure the heater is plugged into a grounded outlet. Disconnect the heater before cleaning or performing maintenance. Follow all warnings and instructions detailed in this manual to prevent fire or injury.
General Safety Guidelines
Read all instructions carefully before using your Intertek heater. Operate the heater on a stable, level surface, avoiding damp or uneven areas. Do not use outdoors or in bathrooms. Keep the heater free from dust and lint accumulation for optimal performance and safety.
Never insert objects into the heater vents, and avoid covering the heater during operation. Always unplug the heater when not in use, and allow it to cool completely before storing.
Electrical Safety Information
Ensure your outlet voltage matches the heater’s specifications to prevent damage or fire hazards. Never operate the heater with a damaged cord or plug; replace immediately. Avoid using extension cords, but if necessary, use a heavy-duty cord rated for the heater’s wattage.
Do not run the cord under carpeting or rugs, and keep it away from heat sources. Always unplug the heater before cleaning or performing maintenance. If the heater malfunctions, disconnect power and seek professional assistance.
Operating Instructions
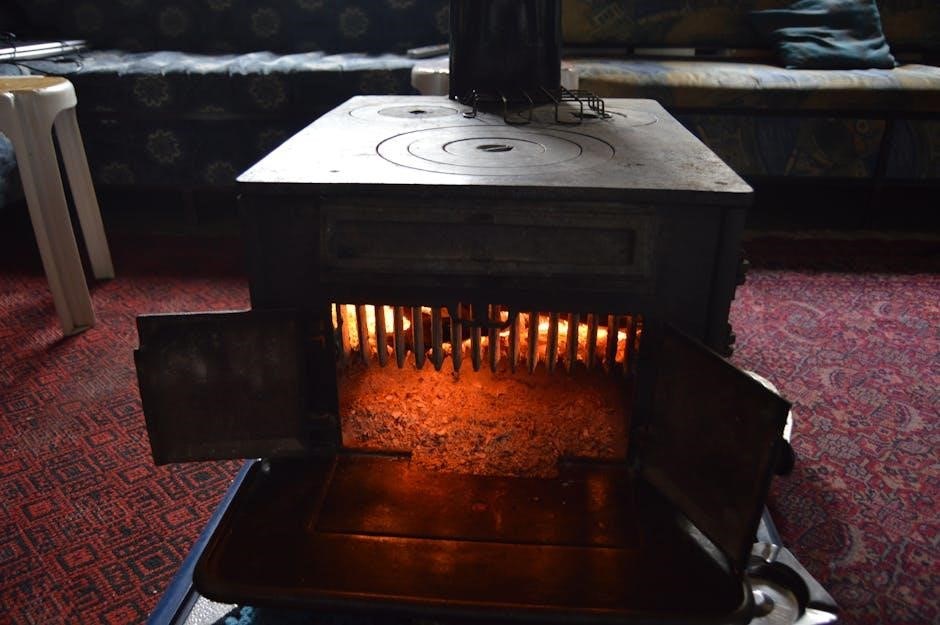
Before use, place the heater on a stable, level surface, away from flammable materials. Ensure the air intake and outlet are unobstructed. Plug the heater into a grounded outlet, verifying the voltage matches the unit’s requirements. To power on, locate the power button and press it; a light indicator will confirm activation.
Adjust the temperature and fan speed using the control panel. Always supervise the heater during operation and never leave it unattended. To turn off, press the power button again.
Initial Setup and Placement
Carefully unpack your Intertek heater and inspect for any damage. Place the heater on a stable, level surface, ensuring at least three feet of clear space around all sides. Avoid placing it near flammable materials like curtains or furniture. Do not operate in bathrooms or damp environments.

Ensure the power cord is not a tripping hazard and is not covered by rugs or carpets. Proper placement is crucial for safe and efficient operation, maximizing heat distribution.
Powering On and Off
To power on your Intertek heater, plug it into a grounded outlet and use the power button located on the control panel. The indicator light will illuminate, confirming operation. To turn off, press the power button again; the light should extinguish.
Always unplug the heater when not in use or during cleaning. Avoid using extension cords, and never leave the heater unattended while operating. Ensure the power switch is fully engaged.
Control Panel Overview
The Intertek heater’s control panel is designed for intuitive operation. It typically features a power button, temperature settings, and fan speed options; Temperature settings allow you to adjust the desired room warmth, often with a dial or digital display.
Fan speed options control the airflow, impacting heat distribution. Some models include additional features like timers or oscillation controls, enhancing user convenience and energy efficiency.

Temperature Settings
Adjusting the temperature on your Intertek heater is straightforward. Most models utilize a dial or digital controls to select your desired warmth level. Lower settings provide gentle heating, ideal for maintaining comfort, while higher settings deliver rapid warmth.
Precise temperature control ensures optimal energy efficiency and prevents overheating. Some heaters feature a thermostat to automatically maintain the set temperature, enhancing convenience and safety.
Fan Speed Options
Intertek heaters often include multiple fan speed settings, allowing you to customize the heat distribution. Lower fan speeds provide a gentle airflow, suitable for quiet operation and localized warming. Higher speeds circulate air more rapidly, quickly heating larger spaces.
Selecting the appropriate fan speed optimizes comfort and energy efficiency. Experiment with different settings to find the ideal balance between warmth and noise level for your specific needs.
Maintenance and Care
Regular maintenance ensures optimal performance and extends the lifespan of your Intertek heater. Disconnect the heater from power before any cleaning or maintenance procedures. Dust accumulation can reduce efficiency, so periodically wipe down the exterior with a soft, dry cloth.
If your model has a filter, check and replace it as needed, following the instructions in the “Filter Replacement” section. Proper care guarantees safe and efficient operation.
Cleaning Procedures
Before cleaning, always disconnect the Intertek heater from the power outlet. Use a soft, dry cloth to wipe down the exterior surfaces, removing dust and debris. Avoid using abrasive cleaners, solvents, or excessive moisture, as these can damage the heater’s finish.
For stubborn dirt, lightly dampen the cloth with water and mild detergent, then wipe and dry thoroughly. Ensure all parts are completely dry before reconnecting and operating the heater.
Filter Replacement (If Applicable)
Certain Intertek heater models may include an air filter to improve air quality. Check your specific model’s documentation to determine if a filter is present and requires periodic replacement. If equipped, locate the filter access panel – usually on the rear or side of the unit.
Remove the old filter and replace it with a new one of the correct size and type. Reinstall the access panel securely before operating the heater. Regular filter replacement ensures optimal performance.
Troubleshooting Common Issues
If your Intertek heater isn’t functioning correctly, several simple checks can resolve the issue. For a heater that won’t turn on, verify the power cord is securely plugged into a working outlet and the unit is switched on. Insufficient heat output may indicate a dirty filter (if applicable), requiring replacement.
Ensure the thermostat is set to the desired temperature. If problems persist, consult the full manual or contact Intertek support for assistance.
Heater Not Turning On
If your Intertek heater fails to power on, begin by confirming the unit is properly plugged into a functioning electrical outlet. Test the outlet with another device to rule out a power supply issue. Verify the heater’s power switch is in the “on” position and that any safety features, like overheat protection, aren’t activated.
Inspect the power cord for damage; a frayed cord requires immediate replacement. If these steps don’t resolve the issue, further troubleshooting may be needed.
Insufficient Heat Output
If your Intertek heater isn’t producing enough heat, ensure the thermostat is set to the desired temperature and isn’t cycling on and off frequently. Check for obstructions blocking the heater’s intake or output vents, as these can restrict airflow and reduce efficiency. Confirm the heater isn’t positioned too close to walls or furniture.
A dirty filter (if applicable) can also limit heat output; cleaning or replacing it may resolve the issue. Verify the wattage setting is appropriate for the room size.
Understanding Intertek Certifications (ETL, UL)
Intertek heaters often carry ETL or UL certifications, demonstrating safety and performance standards. ETL (Electrical Testing Laboratories) certification signifies product evaluation to North American safety standards. UL (Underwriters Laboratories) Listing indicates similar rigorous testing and compliance with nationally recognized safety requirements.
Both ETL and UL assure consumers the heater has been independently assessed for potential hazards, providing peace of mind regarding electrical safety and operational reliability.
What is ETL Certification?
ETL certification, from Intertek, signifies a product has met the required safety standards for North America; This independent testing assesses potential hazards like electrical shock and fire risk. ETL Listed Mark indicates compliance with UL standards, offering a globally recognized safety assurance.
Manufacturers seek ETL listing to demonstrate commitment to product safety and quality, building consumer trust. It’s a vital step for market access and regulatory compliance.
What is UL Listing?
UL Listing, from Underwriters Laboratories, demonstrates a product has been tested and meets nationally recognized safety standards. This rigorous evaluation assesses potential hazards, ensuring products are safe for intended use. UL-listed products undergo ongoing surveillance to maintain compliance.
Manufacturers obtain UL Listing to showcase product safety and gain consumer confidence. It’s often required by retailers and building codes, signifying a commitment to quality and reliability.
Intertek Heater Features & Specifications
Intertek heaters boast diverse features, including varying wattage (1500W common) and voltage requirements, typically 120V. Heater types range from ceramic – offering quick, focused heat – to infrared, providing radiant warmth. Specific models, like the Soleil Infrared Cabinet Heater, offer unique benefits.
Specifications vary by model, impacting heating capacity and energy efficiency. Understanding these details ensures selecting the right heater for your needs and space.
Wattage and Voltage
Intertek heaters commonly operate at 1500 watts, providing substantial heat output for room warming. However, wattage can vary between models, influencing heating speed and energy consumption. Voltage is typically 120V in North American markets, ensuring compatibility with standard household outlets.
Always verify the specific wattage and voltage listed on your heater’s label and power adapter to prevent damage or safety hazards. Using incorrect voltage can void the warranty.
Heater Type (Ceramic, Infrared, etc.)
Intertek manufactures various heater types, including ceramic, infrared, and oil-filled radiator models. Ceramic heaters are known for quick heating and portability, utilizing ceramic heating elements. Infrared heaters directly warm objects and people, offering efficient targeted heat.
Understanding your heater’s type is crucial for optimal use and safety. Each type has unique characteristics affecting heating style and energy efficiency. Refer to your model’s specifications for details.

Power Adapter Information
Intertek heaters often utilize external power adapters for operation, commonly specified as 12V 2A with a 5.5×2.5mm barrel connector. Using the correct adapter is vital to prevent damage and ensure safe operation. Always verify compatibility before use.
Genuine Intertek adapters guarantee optimal performance and safety standards. Be cautious of third-party alternatives, as they may not meet required specifications. Look for Intertek branding and model numbers for authentication.
Compatible Power Adapter Specifications (12V 2A, 5.5×2.5mm)
For optimal performance and safety, Intertek heaters frequently require a power adapter with specific characteristics. The standard voltage is 12V DC, with a current output of 2A (2000mA). Crucially, the DC connector must be a 5.5×2.5mm barrel type.
Using an adapter with incorrect specifications can lead to malfunction, damage the heater, or even pose a safety hazard. Always double-check these parameters before connecting a replacement adapter.
Identifying Genuine Intertek Power Adapters
Ensuring you use a genuine Intertek power adapter is vital for maintaining heater functionality and safety. Look for clear Intertek branding on the adapter itself, including logos and model numbers (like 3A-183WP12). Genuine adapters will consistently meet the required 12V 2A and 5.5×2.5mm specifications.
Beware of counterfeit adapters that may not meet safety standards. Purchasing directly from authorized retailers or Intertek’s official channels minimizes the risk of receiving a non-genuine product.
UPC Barcode Information
The Universal Product Code (UPC) is crucial for identifying specific Intertek heater models. Utilizing the UPC allows for accurate product verification and sourcing of relevant information. Common Intertek heater UPC codes include 891101002341, 670045150673, and 600150489078.
Barcode Spider and similar online resources can decode these UPCs, providing details about the heater’s features and specifications. This aids in confirming compatibility and ensuring you have the correct model.
Using UPC Codes for Product Identification
UPC codes serve as unique identifiers for each Intertek heater variation, streamlining product recognition and inventory management. Scanning or manually entering the UPC – such as 891101002341, 670045150673, or 600150489078 – quickly reveals essential product details.
Online databases like Barcode Spider leverage these codes to display specifications, pricing, and related items, ensuring accurate identification and informed purchasing decisions for Intertek heaters.
Specific Intertek Heater UPC Codes (891101002341, 670045150673, 600150489078)
These UPC codes pinpoint specific Intertek heater models. 891101002341 identifies the Soleil Infrared Cabinet Heater. 670045150673 corresponds to an 8-foot power adapter compatible with model 3A-183WP12. Lastly, 600150489078 designates a 5/6 inch LED slim disk light with AC technology.
Utilizing these codes in online searches provides precise product information, ensuring compatibility and accurate identification of your Intertek heater and its accessories.
Warranty Information
Intertek heaters are covered by a limited warranty, protecting against manufacturing defects. Warranty coverage duration varies by model, so retain your purchase receipt for verification. The warranty typically covers parts and labor for repair or replacement.
To claim warranty service, contact Intertek support with your model and serial number. Damage from misuse, accidents, or unauthorized repairs voids the warranty. Review the full warranty details included with your heater.
Intertek Heater Warranty Coverage
Intertek’s heater warranty generally covers defects in materials and workmanship for a specified period from the date of purchase. This coverage includes repair or replacement of the defective unit, at Intertek’s discretion. The warranty does not cover normal wear and tear, accidental damage, or misuse.
Specifically, the warranty excludes issues caused by improper voltage, lack of maintenance, or unauthorized modifications. Proof of purchase is essential for any warranty claim. Always refer to the warranty card included with your heater for complete details.

How to Claim Warranty Service
To initiate a warranty claim, first, gather your proof of purchase (receipt or invoice) and the heater’s model and serial numbers. Contact Intertek’s customer support via phone or email, detailing the issue and providing the required information.
You may be asked to provide photos or videos demonstrating the defect. Intertek will then guide you through the return or repair process, potentially requiring you to ship the heater to an authorized service center.
Frequently Asked Questions (FAQ)
Q: How do I determine my heater’s age? A: Locate the serial number and utilize online resources or Intertek’s manufacturing date codes for decoding. Q: What if my heater won’t turn on? A: Check the power cord, outlet, and ensure the unit isn’t overheating.
Q: Is a power adapter included? A: Some models require a compatible 12V 2A adapter (5.5×2.5mm). Q: Where can I find replacement filters? A: Filter availability depends on the model; contact Intertek support.
Contacting Intertek Support
For assistance with your Intertek heater, reaching their support team is crucial. While direct contact information isn’t readily available online, exploring Intertek’s general website is a starting point. You may find relevant contact forms or departmental emails.
Alternatively, referencing the warranty information included with your heater might provide specific support channels. Consider searching online forums or communities dedicated to HVAC systems for shared experiences and potential solutions.
Resources for HVAC and Water Heater Age Determination
Determining the age of your Intertek heater, or other HVAC equipment, often requires external resources. The Building Intelligence Center (buildingintelligencecenter.com) is a valuable tool, offering indexed lists of manufacturers and methods for decoding serial numbers.

This site guides users through locating brand names and serial numbers to pinpoint the manufacturing date. Additionally, articles like “How do I determine the age of my air conditioner?” provide specific decoding instructions for various brands.
Building Intelligence Center
The Building Intelligence Center (buildingintelligencecenter.com) serves as a central resource for identifying the manufacture date of HVAC and water heating systems. It streamlines the process by offering alphabetized lists of brands, simplifying the initial search.
Users can locate their heater’s manufacturer and then utilize provided guidance to decode the serial number, ultimately revealing the unit’s age. This platform is invaluable for maintenance and warranty purposes.
Decoding Air Conditioner Serial Numbers
While focused on air conditioners, the principles of serial number decoding can often be applied to Intertek heaters. The Building Intelligence Center suggests a systematic approach: first, locate the manufacturer’s name and then the serial number on the unit itself.
Following this, consult resources detailing how to interpret the serial number’s format to determine the date of manufacture, aiding in age assessment and potential warranty claims.