Viper AS710R Parts Manual: A Comprehensive Overview (02/16/2026)
This manual, dated February 16, 2026, provides detailed parts information for the Viper AS710R cleaning machine. It’s crucial to reference the model and serial number when ordering replacements.
The document outlines assembly breakdowns, component details, and the electrical system, including wiring diagrams (VR13440). A comprehensive wear and tear parts list is also included.
Users will find sections dedicated to the drive motor, chassis, direction control, and frame assemblies, alongside specifics on brushes, tanks, seats, and bumpers.
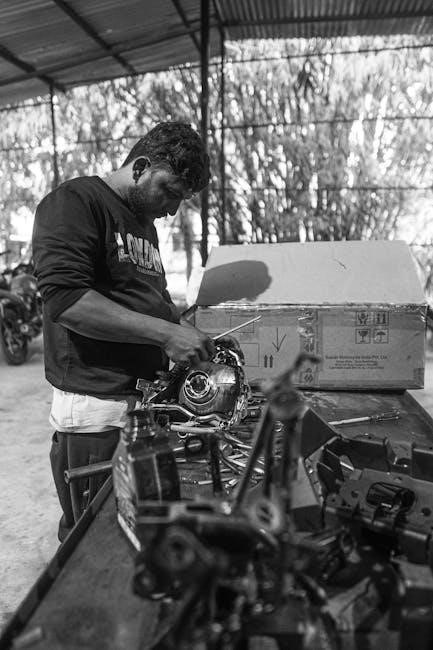
The Viper AS710R is a robust and reliable industrial cleaning machine designed for a variety of applications, from warehouse floors to commercial spaces. This parts manual serves as an essential resource for technicians, maintenance personnel, and anyone involved in the repair or upkeep of this equipment. Understanding the intricacies of the AS710R’s components is paramount for ensuring optimal performance and longevity.
This manual provides a systematic breakdown of the machine, detailing each assembly and its constituent parts. Proper identification of components, utilizing the part numbers provided, is critical when ordering replacements. Always verify the model and serial number of the specific AS710R unit to guarantee compatibility. The information contained herein is intended to facilitate efficient repairs, minimize downtime, and maintain the AS710R in peak operating condition. Careful study of this manual will empower users to effectively address maintenance needs and troubleshoot potential issues.
Scope of the Parts Manual
This Viper AS710R Parts Manual comprehensively covers all major assemblies and components of the cleaning machine. It details parts lists for the complete assembly, drive motor and chassis, direction control, front main frame, brush, and electric systems. Specific sections are dedicated to the control housing, squeegee bracket, and squeegee assemblies, providing detailed breakdowns for each.
Furthermore, the manual includes in-depth information on the solution and recovery tank assemblies, the seat assembly, and the bumper components. A dedicated section outlines electric parts, including detailed breakdowns and the main connecting wire diagram (VR13440). Finally, a crucial wear and tear parts list is provided to assist with proactive maintenance. This manual is intended to be a complete reference guide for all parts-related needs, ensuring accurate identification and ordering for efficient repairs and upkeep of the Viper AS710R.
Safety Precautions
Important: Before attempting any repairs or parts replacement on the Viper AS710R, always disconnect the batteries to prevent accidental electrical shock or machine activation. Wear appropriate personal protective equipment (PPE), including safety glasses and gloves, to safeguard against potential hazards.
Ensure the machine is parked on a level surface and secured to prevent rolling during maintenance. When handling components, be mindful of sharp edges and heavy parts. Refer to the complete assembly overview and individual assembly breakdowns within this manual for proper disassembly and reassembly procedures. Never modify any parts or attempt repairs beyond your skill level.
If unsure about any procedure, consult a qualified technician. Improper repairs can compromise machine safety and performance. Always verify part compatibility using the model and serial number before installation. Following these precautions will help ensure a safe and successful maintenance experience.
Machine Specifications
This section details the Viper AS710R’s crucial identifiers, including the model and serial number, essential for accurate parts ordering and service referencing.
Model and Serial Number Identification
Locating the Model and Serial Number: Accurate identification of your Viper AS710R is paramount when requesting parts or seeking technical support. The model number definitively identifies the machine type, while the serial number provides a unique identifier for that specific unit.
Importance of Accurate Information: Providing the correct model and serial number ensures that you receive the appropriate replacement parts, preventing delays and ensuring compatibility. Incorrect information can lead to the shipment of unsuitable components, causing further inconvenience.
Recording Your Information: The parts manual emphasizes the importance of recording both the model and serial number for future reference. A designated space is provided within the manual for this purpose. This proactive step streamlines future maintenance and repair processes.
Where to Find the Information: Typically, the model and serial number are located on a data plate affixed to the machine’s chassis, often near the control panel or within the battery compartment. Consult the machine itself for the exact location.
Technical Data Sheet
Key Specifications: While a complete technical data sheet isn’t provided in the excerpt, understanding core specifications is vital for informed maintenance and repair of the Viper AS710R. This includes details about the power source and battery capacity.
Battery Information: The manual specifically mentions the use of 6V 245AH batteries. Knowing the correct voltage and amp-hour rating is crucial when replacing batteries to maintain optimal machine performance and prevent damage to the electrical system.
Voltage and Capacity: Utilizing batteries with incorrect specifications can lead to reduced run time, inefficient cleaning, and potential harm to the machine’s electronic components. Always adhere to the manufacturer’s recommended battery type.
Further Details: A comprehensive technical data sheet would typically include information on tank capacities (solution and recovery), brush dimensions, motor power, and overall machine dimensions. Refer to supplemental documentation for these details.
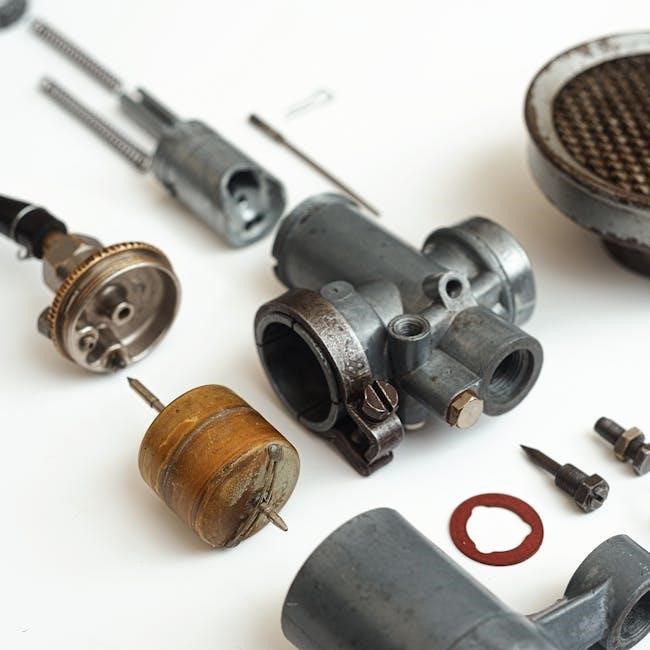
Assembly Breakdown
The Viper AS710R parts manual details complete assembly views, alongside breakdowns of key components like the drive motor, chassis, and direction control systems.
Further sections cover the front main frame, brush, electric parts, control housing, and squeegee assemblies for detailed repair guidance.
Complete Assembly Overview
The “Complete Assembly” section of the Viper AS710R parts manual (pages 2-3) presents a comprehensive visual and numerical breakdown of the machine’s major components. This overview is designed to provide a holistic understanding of how all parts integrate to form the functional cleaning unit.
Key assemblies listed include the Driver Assy and Main Frame, Squeegee Bracket Assembly, Front Main Frame Assembly, and Electric Parts Assembly. Also detailed are the Direction Control Assembly, Lift Brush Pedal Assembly, and both left and right Crush-Protect Assemblies. Further components listed are the Front Housing Assembly, Solution Tank Assembly, Recovery Tank Assembly, Recovery Tank Lock Assembly, Seat Assembly, Recovery Tank Cover Assembly, Brush Assembly, and Squeegee Assembly.
Finally, the overview includes the Batteries (6V 245AH) as a crucial part of the complete machine. Each item is assigned a quantity (Qty) for easy identification during parts ordering and maintenance procedures. This section serves as the foundational reference point for navigating the more detailed breakdowns in subsequent chapters of the manual.
Drive Motor and Chassis Assembly
The Drive Motor and Chassis Assembly section (pages 4-5 of the manual) details the core components responsible for the Viper AS710R’s mobility and structural integrity. This assembly focuses on the powertrain and supporting framework of the machine.
Specific parts within this assembly are identified by a “Part No” for accurate ordering. The documentation provides a detailed listing of each component, allowing technicians to easily locate and replace worn or damaged parts. This section is critical for maintaining the machine’s operational performance and ensuring reliable movement during cleaning operations.
The assembly breakdown includes all elements related to the drive system, from the motor itself to the chassis components that provide support and protection. Proper maintenance of this assembly is essential for preventing downtime and maximizing the lifespan of the Viper AS710R. Quantities (Qty) are clearly indicated for each part.
Direction Control Assembly
The Direction Control Assembly, detailed on pages 6-7 of the Viper AS710R parts manual, outlines the components governing the machine’s steering and maneuverability. This assembly is crucial for precise control during operation, enabling efficient cleaning in various environments.
The parts list within this section utilizes a “Part No” system for streamlined ordering of replacement components. Technicians can readily identify and procure the necessary parts to address any steering-related issues. Maintaining this assembly ensures responsive and accurate directional control, contributing to operator safety and cleaning effectiveness.
This assembly encompasses all elements related to steering mechanisms, including linkages, controls, and associated hardware. Proper maintenance and timely replacement of worn parts are vital for preserving the Viper AS710R’s handling characteristics and preventing operational disruptions. Quantities (Qty) for each part are clearly specified.
Front Main Frame Assembly
The Front Main Frame Assembly, comprehensively detailed on pages 8-9 of the Viper AS710R parts manual, represents the structural core of the machine’s front section. This assembly provides the foundational support for key components like the brush assembly and front housing, ensuring operational stability and durability.
The parts list within this section employs the designated “Part No” system, facilitating accurate identification and ordering of replacement parts. Maintaining the integrity of this assembly is paramount for preserving the machine’s structural soundness and preventing potential failures during operation.
This assembly includes all structural elements forming the front chassis, including beams, supports, and mounting points. Regular inspection and replacement of worn or damaged components are crucial for upholding the Viper AS710R’s performance and extending its service life. Quantities (Qty) are clearly indicated for each part.
Brush Assembly
The Brush Assembly, meticulously outlined on pages 10-11 of the Viper AS710R parts manual, is critical for the machine’s cleaning effectiveness. This section details all components involved in the scrubbing action, ensuring optimal performance and efficient debris removal. Accurate part identification relies on the “Part No” system detailed within the manual.
The assembly encompasses the brush itself, along with associated mounting hardware, drive components, and protective elements. Maintaining this assembly is vital for consistent cleaning results and preventing damage to the machine or the surfaces being cleaned. Regular inspection for wear and tear is recommended.
The manual provides a clear breakdown of each part, specifying quantities (Qty) needed for a complete assembly or replacement. Proper maintenance and timely replacement of worn brushes are essential for maximizing cleaning power and prolonging the lifespan of the Viper AS710R.
Electric Parts Assembly
The Electric Parts Assembly, comprehensively covered on pages 12-13 of the Viper AS710R parts manual, details the intricate electrical system powering the machine. This section is crucial for understanding the components responsible for operation, control, and safety. Identifying the correct part number, utilizing the 7, 8, or 9-digit system, is paramount when ordering replacements.
This assembly includes motors, wiring harnesses, control modules, and safety switches. The manual emphasizes the importance of specifying the machine’s model and serial number to ensure compatibility. Proper electrical function is vital for reliable performance and operator safety.
Referencing the Main Connecting Wire Diagram (VR13440) is essential for troubleshooting and repair. The manual’s detailed parts list allows for precise identification and replacement of any electrical component, maintaining the Viper AS710R’s operational integrity.
Control Housing Assembly
The Control Housing Assembly, detailed within the Viper AS710R Parts Manual, encompasses the components forming the operator’s control station. Found on pages 14-15, this section is vital for understanding the machine’s operational interface and ensuring proper functionality. Accurate part identification, using the 7, 8, or 9-digit part number system, is crucial for ordering replacements.
This assembly includes the control panel, switches, levers, and associated wiring. It’s essential to specify the machine’s model and serial number when requesting parts, guaranteeing compatibility and correct fit. Maintaining a functional control housing is paramount for safe and efficient operation.
The manual provides a detailed breakdown of each component, facilitating accurate repairs and replacements. Proper assembly ensures optimal control and responsiveness, contributing to the Viper AS710R’s overall performance and user experience;
Squeegee Bracket Assembly
The Viper AS710R Parts Manual dedicates pages 16-17 to the Squeegee Bracket Assembly, a critical component for effective water recovery. This section details the brackets that secure the squeegee blades, ensuring consistent contact with the floor surface for optimal cleaning performance. Utilizing the correct 7, 8, or 9-digit part number is essential when ordering replacements.
The assembly includes various bracket types, mounting hardware, and adjustment mechanisms. Proper maintenance of these components prevents streaking and ensures efficient water removal. Specifying the machine’s model and serial number guarantees compatibility and a precise fit for all replacement parts.
A thorough understanding of this assembly is crucial for technicians performing repairs or replacements. Maintaining the squeegee bracket assembly contributes significantly to the Viper AS710R’s overall cleaning effectiveness and minimizes water waste.
Squeegee Assembly
The Viper AS710R Parts Manual allocates pages 18-19 to the Squeegee Assembly, detailing the blades and related components responsible for removing cleaning solution and debris from the floor. Accurate part identification, using the 7, 8, or 9-digit part number, is vital for correct replacements. This assembly works in conjunction with the Squeegee Bracket Assembly for optimal performance.
The manual illustrates various squeegee blade types and lengths, catering to different floor surfaces and cleaning applications. Maintaining blade integrity is crucial for preventing streaks and ensuring complete water pickup. Regular inspection and replacement of worn blades are recommended.
Technicians should consult this section when addressing water recovery issues or performing routine maintenance. Proper squeegee assembly ensures the Viper AS710R delivers a dry, clean surface, maximizing efficiency and user satisfaction.

Component Details
This section of the Viper AS710R parts manual provides in-depth breakdowns of key machine components, including tanks, seats, and bumpers, for detailed repair work.
Solution Tank Assembly
The Solution Tank Assembly, crucial for the Viper AS710R’s cleaning function, is detailed in this section; This assembly comprises the solution tank itself, alongside associated components like the tank lock assembly and potentially connecting hoses or fittings – though specifics aren’t fully detailed in the provided source.

When ordering replacement parts for this assembly, referencing the correct “Part No.” from the parts list (as indicated by the 7, 8, or 9-digit code) is essential. Ensure the model and serial number of the AS710R are also provided to guarantee compatibility. The manual doesn’t list individual parts within the solution tank assembly, suggesting it may be supplied as a more complete unit.
Proper maintenance of the solution tank is vital for optimal machine performance. Regular inspection for cracks, leaks, or damage is recommended. Always consult the complete parts manual and safety guidelines before disassembly or repair.
Recovery Tank Assembly
The Recovery Tank Assembly, integral to the Viper AS710R’s operation, collects the used cleaning solution. This section details the tank itself, along with the Recovery Tank Lock Assembly and the Recovery Tank Cover Assembly, as outlined in the parts list. Like the solution tank, specific internal components aren’t individually itemized, suggesting a more holistic replacement approach.
Accurate part ordering requires utilizing the 7, 8, or 9-digit “Part No.” from the manual, alongside the machine’s model and serial number. This ensures the correct replacement is received. Regularly check the recovery tank for any signs of damage, cracks, or leaks to maintain efficient operation.
Properly functioning recovery systems are essential for preventing spills and maintaining a safe working environment. Refer to the complete manual for detailed maintenance procedures and safety precautions before any repairs are undertaken.
Seat Assembly
The Seat Assembly for the Viper AS710R is a crucial component for operator comfort and safety during machine operation. The parts manual dedicates a specific section to this assembly, indicating its importance. While the manual doesn’t list individual seat components (like cushions or adjustment mechanisms), it provides a part number for the complete Seat Assembly itself.
When ordering a replacement, referencing the machine’s model and serial number is vital, alongside the 7, 8, or 9-digit “Part No.” from the manual. This ensures compatibility and a correct fit. Inspect the seat regularly for wear and tear, damage, or loose fasteners.
A secure and comfortable seat contributes to operator control and reduces fatigue during extended use. Prioritize safety by ensuring the seat is properly installed and functioning before each operation.
Bumper Assembly
The Viper AS710R’s Bumper Assembly plays a vital role in protecting the machine from damage during operation and minimizing impact in confined spaces. The parts manual dedicates a section to this assembly, highlighting its significance for machine durability. The manual details the Bumper Assembly as a distinct component for ordering purposes.
When procuring replacement bumpers, always utilize the 7, 8, or 9-digit “Part No.” listed in the manual, alongside the machine’s specific model and serial number. Regular inspection of the bumpers is crucial to identify cracks, deformations, or loose mounting points.
Maintaining intact bumpers safeguards the machine’s internal components and prevents costly repairs. A functioning bumper assembly also contributes to workplace safety by reducing potential hazards.

Electrical System
This section details the Viper AS710R’s electrical components, including detailed breakdowns of electric parts and assemblies. Wiring diagrams, specifically VR13440, are also provided for reference.
Electric Parts – Detailed Breakdown
This section provides a comprehensive listing of individual electric parts utilized within the Viper AS710R cleaning machine. Each component is meticulously detailed, facilitating accurate identification and replacement. The parts list includes crucial information such as part numbers, descriptions, and quantities required for various assemblies.
Users will find specifics on motors, wiring harnesses, connectors, switches, and other electrical components essential for the machine’s operation. The detailed breakdown assists technicians in diagnosing electrical issues and performing effective repairs. Proper identification using the provided part numbers is paramount when ordering replacements to ensure compatibility and functionality.
Referencing the model and serial number of the machine is vital when navigating this section, as variations may exist between different configurations. This detailed approach ensures that the correct parts are selected, minimizing downtime and maximizing the efficiency of maintenance procedures. Careful attention to the part numbers will guarantee a successful repair.
Other Electric Parts Assembly
This assembly focuses on the supplementary electrical components of the Viper AS710R, extending beyond the primary electric parts detailed previously. It encompasses a range of items crucial for complete functionality, including various connectors, wiring looms, and control modules. The parts list provides specific quantities needed for a full assembly or replacement.
Detailed descriptions accompany each part number, aiding in accurate identification and ordering. Technicians should carefully review this section when addressing complex electrical repairs or performing preventative maintenance. Ensuring compatibility with the machine’s model and serial number is essential for optimal performance.
This assembly supports the core electrical system, contributing to the reliable operation of the Viper AS710R. Proper installation and maintenance of these components are vital for preventing downtime and maintaining the machine’s efficiency. Refer to the main connecting wire diagram (VR13440) for context.
Main Connecting Wire Diagram (VR13440)
Diagram VR13440 serves as the central reference for understanding the Viper AS710R’s electrical system. It visually maps the complete wiring harness, illustrating the connections between all electrical components – from the batteries and motors to the control panels and sensors.
This detailed schematic is indispensable for troubleshooting electrical issues, performing repairs, and conducting modifications. Technicians should familiarize themselves with the diagram’s symbols and conventions to accurately interpret the wiring pathways. Correctly identifying wire colors and connector types is paramount.
The diagram facilitates efficient diagnostics, enabling quick pinpointing of faults and minimizing downtime. It’s crucial to use this diagram in conjunction with the “Electric Parts” and “Other Electric Parts Assembly” sections for comprehensive understanding. Always disconnect the power source before working on the electrical system.
Maintenance & Replacement
Regular maintenance and timely replacement of wear parts, detailed on page 33, are vital for optimal Viper AS710R performance and longevity.
Wear and Tear Parts List
Maintaining the Viper AS710R requires consistent attention to components subject to regular wear and tear. This list, found on page 33 of the parts manual, is essential for preventative maintenance and minimizing downtime. Key items include brushes, which degrade with abrasive surfaces, and squeegee blades, susceptible to cracking and deformation.
The recovery tank lock assembly and various seals within the solution and recovery tanks are also prone to wear, potentially leading to leaks. Regular inspection of the lift brush pedal assembly and crush-protect assemblies is recommended, as these components endure significant stress during operation. Batteries (6V 245AH) have a limited lifespan and require periodic replacement to ensure consistent power.
Furthermore, consider the gradual wear on the driver assembly and main frame, though these typically require less frequent attention. Proactive replacement of these parts, guided by the manual, extends the machine’s operational life and maintains cleaning efficiency.