Cuisinart Bread Maker Instruction Manual: A Comprehensive Guide
Welcome! This manual provides detailed instructions for your Cuisinart bread maker, ensuring optimal performance and delicious results.
Discover features like the paddle removal notification and delay timer, alongside troubleshooting tips for common issues.
Understanding Your Cuisinart Bread Maker
Your Cuisinart Automatic Bread Maker is designed for convenient and consistent bread baking. Familiarize yourself with the components – the bread pan, kneading paddle, and control panel. The machine automates the entire bread-making process, from mixing and kneading to rising and baking.
Key features include programmable cycles for various bread types, a delay timer for fresh bread whenever you desire, and a keep-warm function. The beeping notification alerts you when the paddle should be removed to avoid unwanted marks on the loaf. Understanding these features will unlock the full potential of your bread maker.
Model variations may exist, indicated by letters following the number on the product, often denoting finish or retailer-specific versions. Always refer to your specific model’s features as outlined in this manual for the best baking experience. Proper use ensures years of enjoyment!
Model Identification and Serial Numbers
Identifying your Cuisinart bread maker’s model and serial number is crucial for warranty claims, accessing specific support resources, and ensuring you have the correct documentation. The model number typically appears on the product’s base or back panel. It’s a combination of letters and numbers that uniquely identifies your machine’s configuration.
The date code/serial number, also found on the bottom of the product base, is a set of letters and digits. This number provides information about the manufacturing date and helps track the product’s history. Keep this information readily available, along with your proof of purchase, for any service requests or warranty inquiries.
Letters following the number often indicate the finish option or the vendor where the item was purchased (like Costco). Recording both the model and serial number in a safe place will streamline any future interactions with Cuisinart customer support.
Locating the Date Code/Serial Number
Finding the date code/serial number on your Cuisinart bread maker is straightforward. This crucial information is typically located on the underside of the product base. Carefully turn your bread maker over and inspect the bottom surface. You’ll be looking for a series of letters and digits imprinted directly onto the plastic or a sticker affixed to the base.
The date code/serial number is a unique identifier for your specific unit. It’s essential for warranty registration, accessing customer support, and confirming compatibility with accessories or replacement parts. Note that the exact placement may vary slightly depending on the model, but it will always be on the bottom.
Record this number in a safe and accessible location, along with your purchase date and retailer information. Having this information readily available will expedite any service requests or warranty claims you may need to file in the future.
Safety Precautions
To ensure safe operation of your Cuisinart bread maker, please adhere to the following precautions. Always unplug the appliance when not in use and before cleaning. Never immerse the bread maker housing, cord, or plug in water or other liquids. Avoid touching hot surfaces; use handles or knobs. Allow the appliance to cool completely before handling or cleaning.
Exercise caution when removing the bread pan due to residual heat. Do not operate the appliance with a damaged cord or plug, or after a malfunction. If the appliance malfunctions, discontinue use immediately and contact Cuisinart customer support. Keep the appliance out of reach of children.
Supervise children closely when the appliance is in use. Do not use outdoors. Use only genuine Cuisinart accessories. Failure to follow these safety precautions could result in injury or damage to the appliance.
Getting Started: Initial Setup
Before your first loaf, proper setup is crucial. Carefully unpack your Cuisinart bread maker and verify all components are present – bread pan, kneading paddle, measuring cup, and measuring spoon. Remove any protective packaging materials. Wipe the bread pan and paddle with a damp cloth; avoid soap initially.
Position the bread maker on a flat, stable surface away from water sources. Ensure adequate ventilation around the appliance. Plug the power cord into a grounded outlet. Perform a test run without ingredients to burn off any manufacturing residue – select the basic cycle and let it run completely.
Familiarize yourself with the control panel and cycle options. Refer to the ingredient guidelines for accurate measurements. Your Cuisinart bread maker is now ready for baking!
Unpacking and Component Checklist
Upon opening the box, carefully inspect your Cuisinart bread maker for any shipping damage. The package should contain the following components: the bread maker unit itself, a non-stick bread pan, a kneading paddle (and potentially an extra), a measuring cup specifically designed for dry ingredients, and a measuring spoon for yeast and salt.
Verify the presence of this instruction manual and any included recipe booklets. A quick visual check ensures all parts are accounted for. The serial number, stamped on the bottom of the unit, is important for warranty registration and customer support.
Retain the original packaging for potential future transport or storage. If any components are missing or damaged, contact Cuisinart customer service immediately for assistance.
First-Time Use: Cleaning and Preparation
Before your inaugural bake, thorough cleaning is essential. Remove the bread pan and kneading paddle from the unit. Wash both components with warm, soapy water; ensure they are completely dry before reinserting. Wipe down the exterior of the bread maker with a damp cloth – avoid abrasive cleaners.
It’s recommended to run a practice cycle without any ingredients. This helps eliminate any potential manufacturing residue or odors. Simply plug in the bread maker and select a basic cycle, allowing it to run through its complete process.

Familiarize yourself with the control panel and cycle options. This initial preparation ensures a clean and ready-to-use appliance for your first loaf!
Bread Making Basics
Successful bread making relies on accurate ingredient measurements and understanding the process. Always use fresh ingredients for optimal results. Typically, bread recipes consist of flour, water, yeast, salt, and often sugar or fat. The order of ingredient addition is crucial; generally, liquids first, followed by dry ingredients, with yeast added last.
The bread maker automates kneading, rising, and baking. Kneading develops gluten, creating the bread’s structure. Rising allows the yeast to ferment, producing gas that leavens the dough. Baking sets the structure and creates a golden crust.
Experimentation is key! Start with basic recipes and gradually explore different flours, flavors, and techniques. Remember to always follow the recommended cycle for your chosen recipe.
Ingredient Guidelines and Measurements

Precise measurements are vital for consistent bread making. Use dry measuring cups for flour and other dry ingredients, leveling off with a straight edge. Liquid ingredients should be measured in liquid measuring cups, checking at eye level. A kitchen scale provides the most accurate results, especially for flour.
Flour type significantly impacts the bread’s texture. Bread flour has higher protein content, creating a chewier loaf. All-purpose flour works well for many recipes. Whole wheat flour adds a nutty flavor and denser texture.
Yeast is crucial for leavening. Use active dry yeast or instant yeast, following package instructions for activation. Ensure yeast isn’t expired, as it loses potency over time; Sugar feeds the yeast, while salt controls its activity.
Understanding Bread Maker Cycles
Your Cuisinart bread maker offers various pre-programmed cycles for different bread types. The ‘Basic’ cycle is ideal for white bread, while ‘Whole Wheat’ adjusts kneading and rising times for denser flours. ‘French’ creates a crisp crust, and ‘Sweet’ is designed for enriched doughs.
The ‘Dough’ cycle mixes and kneads ingredients, but doesn’t bake, allowing you to shape the dough for rolls or pizza. ‘Rapid’ shortens the entire process, using faster yeast activation. ‘Gluten-Free’ utilizes a specific algorithm for gluten-free flour blends.
Each cycle includes kneading, rising, and baking phases. Understanding these phases helps you customize recipes. Refer to the manual for cycle durations and recommended ingredient amounts. Experiment to find the perfect cycle for your desired bread!
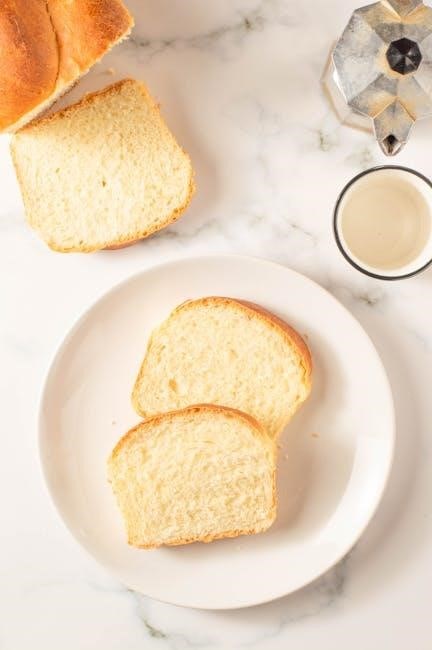
Basic White Bread Recipe
This classic recipe is perfect for beginners! You’ll need 1 ¼ cups warm water, 3 cups bread flour, 2 tablespoons sugar, 1 ½ teaspoons salt, 3 tablespoons softened butter, and 2 ¼ teaspoons active dry yeast.
First, add the water, butter, and sugar to the bread maker pan. Next, sprinkle the yeast over the water and let it sit for 5 minutes. Add the flour and salt. Select the ‘Basic’ cycle and press start.
After the paddle beeps (indicating removal time), carefully remove it. Allow the bread to complete the cycle. Once finished, remove the loaf and let it cool on a wire rack before slicing and enjoying your freshly baked bread!
Advanced Bread Making Techniques
Elevate your bread making! Experiment with different flour types – rye, spelt, or even incorporating whole wheat for a nuttier flavor. Adjust hydration levels by slightly increasing or decreasing water for varied textures.
For artisan loaves, utilize the ‘Dough’ cycle to create a base, then shape and bake in a conventional oven for a crustier finish. Explore adding inclusions like herbs, cheeses, or dried fruits after the initial kneading.
Mastering proofing is key; observe dough rise and adjust cycle times accordingly. Don’t be afraid to experiment with different yeast amounts for unique flavor profiles. Remember, practice makes perfect!
Gluten-Free Bread Recipes
Baking gluten-free requires adjustments! Utilize a gluten-free flour blend specifically designed for bread machines, as single flours often lack structure. Add a binding agent like xanthan gum or psyllium husk – typically 1-2 teaspoons per loaf – to mimic gluten’s elasticity.
Moisture is crucial; gluten-free flours absorb more liquid. Start with slightly increased water and adjust as needed. The ‘Gluten-Free’ cycle, if available, optimizes temperature and kneading for best results.
Expect a denser texture compared to traditional bread. Consider adding ingredients like applesauce or yogurt for added moisture and softness. Experiment with different blends and binders to find your perfect gluten-free loaf!
Whole Wheat Bread Recipes
Embrace the nutty flavor of whole wheat! When using 100% whole wheat flour, expect a denser loaf. Combining it with bread flour (50/50 ratio) yields a lighter texture, perfect for beginners. Whole wheat absorbs more liquid, so increase water by 1-2 tablespoons initially.
Consider adding vital wheat gluten (1-2 teaspoons per loaf) to improve rise and structure, especially with higher percentages of whole wheat. The ‘Whole Wheat’ cycle, if your machine has one, adjusts kneading and rising times accordingly.
Experiment with honey or molasses to enhance flavor and moisture. Monitor the dough during kneading; whole wheat can require a bit more liquid for proper development. Enjoy the wholesome goodness of homemade whole wheat bread!
Sweet Bread and Dough Recipes
Indulge in delightful sweetness! For sweet breads, increase sugar and fat (butter, oil) proportionally to the recipe. Using the ‘Sweet’ or ‘Dough’ cycle is recommended, as these programs offer longer rising times for optimal flavor development and a softer crumb.
Be mindful of yeast activation; sugar feeds yeast, so ensure it’s not too warm or it may deactivate. Add-ins like raisins, chocolate chips, or nuts should be added during the final kneading cycle to prevent them from becoming crushed.
For enriched doughs (like cinnamon rolls), the dough cycle is ideal. After the cycle completes, shape and bake according to your desired recipe. Remember to monitor the dough’s consistency – sweet doughs are often stickier!
Using Specialized Features
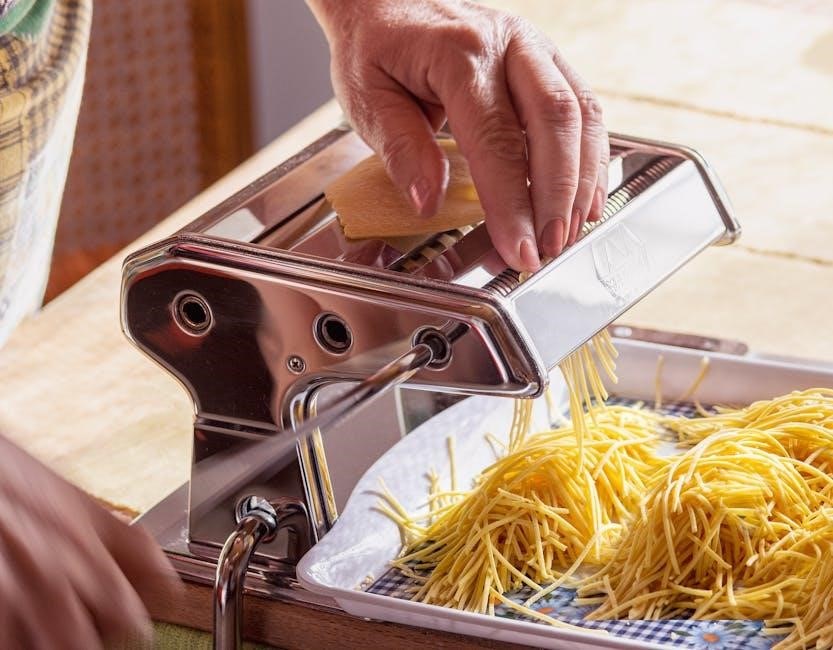
Maximize your bread maker’s potential! The Cuisinart bread maker boasts features designed for convenience and perfect results. The paddle removal notification – a series of beeps before the final rise – alerts you to remove the paddle, preventing unsightly holes in your loaf.
The Delay Timer allows you to schedule baking up to 13 hours in advance, enjoying fresh bread when you desire. Ensure ingredients, especially yeast, remain fresh during the delay. The Keep Warm function maintains bread temperature for up to three hours post-baking, ideal for busy schedules.
Experiment with cycles! Utilize the ‘Gluten-Free’ cycle with appropriate flour blends, and the ‘Dough’ cycle for pizza or roll dough. Refer to the recipe booklet for cycle-specific guidance.
Paddle Removal Notification (Beeping)
A helpful feature for perfect loaves! Your Cuisinart bread maker is equipped with a unique paddle removal notification system. Approximately 60-75 minutes before the end of the bake cycle, the machine will emit a series of six beeps. This signals the optimal time to carefully remove the kneading paddle.
Why remove the paddle? Leaving the paddle in during the final rise can cause it to leave noticeable holes in the finished bread. Removing it ensures a smoother, more aesthetically pleasing loaf.
Caution: The paddle will be warm! Use a utensil or wear oven mitts to safely remove it. This feature is designed to enhance your baking experience and deliver consistently excellent results.
Delay Timer Functionality

Wake up to fresh bread! The delay timer allows you to conveniently schedule bread making up to 13 hours in advance. This feature is perfect for enjoying a warm loaf first thing in the morning or having bread ready when you return home.
How to use it: First, add all your ingredients to the bread pan. Then, select your desired cycle. Press the “Delay” button repeatedly to set the desired delay time, in hours. The display will show the estimated finish time. Press “Start/Stop” to activate the delay timer.
Important notes: Avoid using perishable ingredients like milk or eggs when utilizing the delay timer for extended periods. Ensure the power supply remains uninterrupted during the delay cycle for successful operation.
Keep Warm Function
Enjoy warm bread on your schedule! The Cuisinart bread maker’s Keep Warm function automatically activates once the baking cycle is complete, maintaining your bread at an ideal serving temperature for up to one hour. This prevents your freshly baked loaf from cooling down too quickly.
How it works: After the baking cycle finishes, the machine will automatically switch to the Keep Warm mode. The display will indicate that the Keep Warm function is active. During this time, the heating element cycles on and off to preserve warmth.
Important considerations: While the Keep Warm function is convenient, prolonged warming may slightly dry out the crust. For best results, remove the bread promptly after the Keep Warm cycle ends, or transfer it to a bread box.
Troubleshooting Common Issues
Don’t worry, we’ve got you covered! This section addresses frequent problems encountered while using your Cuisinart bread maker. If your machine isn’t starting, first ensure it’s properly plugged in and the lid is securely closed. A common issue is the paddle not kneading correctly; this often indicates too much or too little liquid in the recipe.
Bread collapsing or not rising? This could stem from using expired yeast, incorrect ingredient measurements, or a power interruption during baking. Remember the machine beeps six times before the final rise to signal paddle removal!
Still facing issues? Double-check your recipe, ingredient quality, and cycle selection. Refer to the detailed instructions within this manual for specific guidance. If problems persist, contact Cuisinart support for assistance.
Bread Maker Not Starting
Is your Cuisinart bread maker refusing to begin its cycle? Several factors could be at play. First, and most simply, verify the power cord is firmly plugged into a functioning electrical outlet. Ensure the outlet itself is providing power by testing it with another device.
Next, check the lid. The bread maker is designed with a safety mechanism that prevents operation if the lid isn’t securely closed. Confirm it’s latched properly. Also, examine the control panel – is the correct cycle selected and the start button pressed?
If these steps don’t resolve the issue, a potential power interruption during a previous cycle might have caused a reset. Try unplugging the machine for a few minutes, then plugging it back in and restarting the process.
Paddle Not Kneading Properly
Experiencing issues with the kneading paddle? A common cause is overloading the bread pan with too much dough, hindering the paddle’s movement. Ensure you’re adhering to the maximum dough capacity specified in the recipe and this manual.

Also, verify the paddle is correctly attached. It should snap securely onto the drive shaft within the bread pan. A loose paddle won’t effectively knead the ingredients. Inspect the paddle for any damage or wear; a bent or broken paddle needs replacement.
Remember the beep notification! Your Cuisinart bread maker beeps six times before the final rise, signaling the optimal time to remove the paddle. Attempting to remove it during kneading can disrupt the process and potentially damage the machine.
Bread Collapsing or Not Rising
Is your bread sinking in the middle or failing to achieve a good rise? Several factors can contribute to this issue. First, ensure your yeast is fresh and active. Expired or improperly stored yeast won’t provide the necessary lift.
Ingredient balance is crucial. Too much liquid or fat can weaken the gluten structure, leading to collapse. Conversely, insufficient liquid hinders gluten development. Carefully measure ingredients according to the recipe.
Ambient temperature also plays a role. A cold kitchen can slow down yeast activity. Consider using slightly warmed liquids (not hot!) to encourage fermentation. Avoid opening the lid during baking, as this releases heat and can cause the bread to fall.
Care and Maintenance
Maintaining your Cuisinart bread maker ensures longevity and consistent performance. Always unplug the appliance and allow it to cool completely before cleaning. The bread pan and kneading paddle are non-stick coated and should be hand-washed with warm, soapy water. Avoid abrasive cleaners or scouring pads, as these can damage the coating.
The exterior of the bread maker can be wiped clean with a damp cloth. Never immerse the appliance in water or any other liquid. Ensure the heating element is free from crumbs or residue; a soft brush can be helpful.
For storage, ensure the bread maker is completely dry. Store in a cool, dry place. Avoid tightly wrapping the cord, as this can cause damage. Regular cleaning and proper storage will keep your bread maker in excellent condition for years to come.
Cleaning Your Cuisinart Bread Maker
Thorough cleaning is essential for optimal performance and hygiene. Begin by unplugging the bread maker and allowing it to cool completely. Remove the bread pan and kneading paddle. These components are non-stick and should be washed by hand with warm, soapy water. Avoid using abrasive cleaners or dishwasher detergents, as they can damage the non-stick coating.
Wipe the exterior of the bread maker with a damp cloth. For stubborn residue, a mild cleaning solution can be used, but ensure no liquid enters the appliance. Pay attention to the heating element, gently removing any crumbs with a soft brush.
Ensure all parts are completely dry before reassembling and storing. Regular cleaning after each use will prevent buildup and maintain the bread maker’s efficiency.
Storage Instructions
Proper storage ensures the longevity of your Cuisinart bread maker. Before storing, ensure the appliance is completely cool, clean, and dry, following the cleaning instructions detailed previously. Store the bread maker in a cool, dry place, away from direct sunlight and moisture. Avoid storing it in a location prone to extreme temperatures or humidity.
It’s recommended to store the bread pan and kneading paddle inside the bread maker’s housing to keep all components together. If storing for an extended period, consider covering the bread maker with a dust cover or placing it in its original packaging to protect it from dust and scratches.
Always store the appliance out of reach of children and ensure the power cord is neatly coiled to prevent damage.
Warranty Information and Support
Cuisinart stands behind the quality of its bread makers. Your Cuisinart Automatic Bread Maker is covered by a limited warranty against defects in materials and workmanship. To obtain warranty service, retain your proof of purchase – the product serial number (stamped on the bottom of the product base) is crucial for processing claims.
The warranty period typically begins from the date of original purchase. Please refer to the separate warranty document included with your appliance for specific details regarding coverage duration and exclusions.
For customer support, visit the official Cuisinart website or contact their customer service department directly. You can find contact information, frequently asked questions, and additional resources online. Keep your model number handy when contacting support for efficient assistance.