Syma Drone Instructions: A Comprehensive Guide (Updated 02/16/2026)
Today’s date is 02/16/2026 07:21:10. This guide details operation of Syma drones like the X5C and X12, featuring 4-axis structures for enhanced speed and maneuverability.
Syma drones have become incredibly popular, offering an accessible entry point into the world of aerial photography and recreational flying. These drones, including models like the X5C, X8C, and X12, are known for their affordability and user-friendly design. They utilize a 4-axis structure, significantly enhancing both flexibility and speed during flight.
Whether you’re a beginner or have some experience, Syma drones provide a versatile platform for indoor and outdoor adventures. Many models boast features like headless mode and altitude hold, simplifying control and making them easier to fly. Furthermore, some versions, such as the X8C Venture, are equipped with cameras for capturing stunning aerial footage and photographs.
Understanding Syma Drone Models (X5C, X8C, X12 & Others)
Syma offers a diverse range of drone models, each with unique features and capabilities. The X5C is a popular entry-level option, while the X8C Venture adds a camera for aerial photography and video recording. The X12 builds upon these features, often incorporating enhanced stability and flight time.
A common thread across these models is the utilization of a 4-axis structure, providing increased maneuverability and speed. Many Syma drones also include headless mode, simplifying orientation, and a 6-axis system for smoother, hand-launched flights. Understanding these distinctions will help you choose the best Syma drone for your needs.
Unboxing Your Syma Drone: What’s Included
Upon opening your Syma drone package, you should find several key components. Expect the drone itself, a remote controller, and the drone’s battery. Crucially, a charging cable is included to power up your new flying companion.
Additional items typically include spare propellers – essential for inevitable bumps and crashes – and a screwdriver for easy replacement. User manuals, often available as downloadable PDFs, provide detailed operating instructions. Verify all listed components are present to ensure a complete and enjoyable unboxing experience before your first flight.
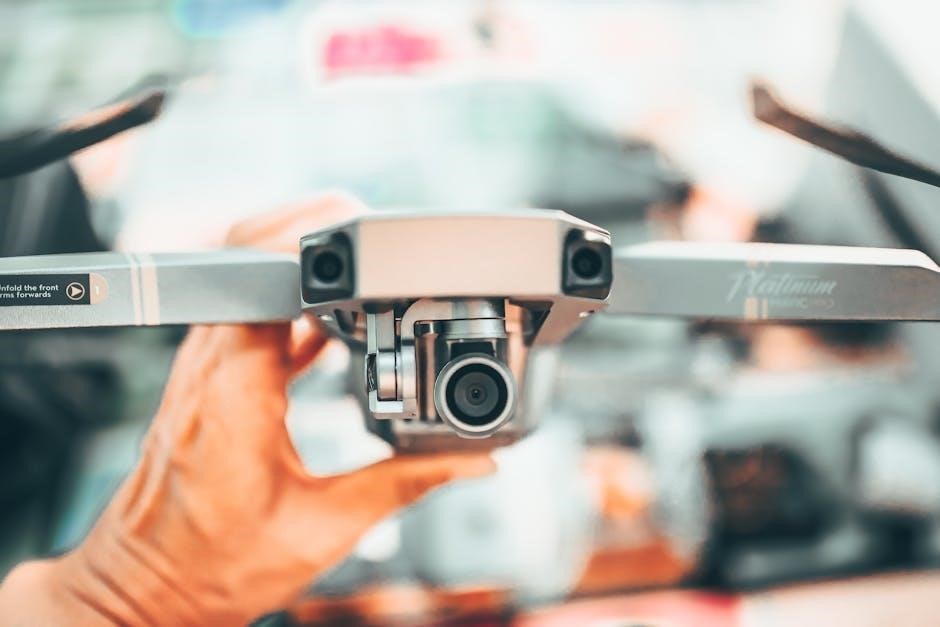
Drone Components Overview
Syma drones boast a robust design centered around a 4-axis structure, contributing to their flexibility and speed. The core of the drone is its frame, housing the motors, battery, and electronic speed controllers. Propellers, crucial for lift and maneuverability, attach directly to these motors.
A camera, present in models like the X8C Venture, allows for aerial photography and videography. The onboard receiver communicates with the remote controller, translating commands into flight actions. Understanding these components is vital for maintenance, repair, and optimizing your drone’s performance.
Identifying the Main Parts of the Drone
Key components include the drone’s frame, providing structural integrity and mounting points for all other parts. Four motors, paired with propellers, generate lift and control movement. The battery powers the entire system, while the receiver interprets signals from the remote controller.
Models like the X12 feature a camera module for capturing aerial footage. Electronic Speed Controllers (ESCs) regulate power to the motors. Recognizing each part facilitates troubleshooting and replacement when necessary, ensuring continued flight capability and optimal performance.
Understanding the Remote Controller
The remote controller is your primary interface with the Syma drone. It features control sticks for throttle (altitude) and directional movement – yaw (rotation), pitch (forward/backward), and roll (left/right). Dedicated buttons activate features like headless mode and initiate 360° rolls.
The controller requires batteries for operation. Understanding the function of each button and stick is crucial for precise control. Proper pairing with the drone is essential before flight, ensuring responsive commands and a safe, enjoyable flying experience.
Charging the Drone Battery
Proper battery charging is vital for optimal drone performance and longevity. Connect the battery to the provided charging cable and USB port. A red light indicator signifies the charging process is underway. Once the battery is fully charged, the red light will extinguish, indicating readiness for flight.
Always adhere to safety precautions during charging. Avoid overcharging, and never leave the battery unattended. Ensure the charging area is clear and dry. Following these guidelines will maximize battery life and ensure safe operation of your Syma drone.
LED Indicator Status During Charging (Red Light)
The LED indicator provides crucial feedback on the charging status of your Syma drone’s battery. A consistently lit red light clearly signals that the charging process is actively occurring. This indicates power is flowing from the charging source to the battery, replenishing its energy reserves.
It’s important to monitor this light. The absence of the red light, meaning it’s off, definitively confirms that the charging cycle is complete. Relying on this visual cue ensures your drone is fully powered and ready for a safe and enjoyable flight experience.
Charging Time and Safety Precautions
Allow sufficient time for a complete charge; specific durations vary by model, but monitor the LED indicator – a red light signifies charging, extinguishing upon completion. Never leave the drone unattended during charging. Use only the provided charger to prevent damage or fire hazards.
Avoid charging on flammable surfaces. Do not overcharge the battery, as this can reduce its lifespan and pose a safety risk. Disconnect the drone immediately after the charging indicator turns off. Always inspect the battery for any signs of damage before each use.
Remote Controller Setup
Before flight, proper remote controller setup is crucial. First, install the required batteries, ensuring correct polarity as indicated within the battery compartment. Next, initiate the pairing process between the drone and the controller. This typically involves powering on both devices simultaneously and following the specific steps outlined in your drone’s user manual.
A successful pairing is usually indicated by a solid LED light on the controller. If pairing fails, repeat the process, ensuring no other similar devices are interfering. Confirm full functionality of all controls before takeoff.
Installing Batteries in the Remote Controller
To begin, locate the battery compartment on the remote controller, typically found on the underside. Gently slide open the cover, revealing the battery slots. Insert the appropriate batteries – usually AA size – ensuring correct polarity, matching the positive (+) and negative (-) markings inside the compartment.
Confirm the batteries are securely seated and the compartment cover is firmly closed. Incorrect battery installation can prevent the controller from powering on or functioning correctly. Always use fresh batteries for optimal performance and avoid mixing old and new batteries.
Pairing the Drone and Remote Controller
Ensure the drone and remote controller are both powered on; The pairing process usually initiates automatically upon startup, but may require a manual step. If automatic pairing fails, consult your specific drone model’s manual for instructions. Typically, this involves simultaneously pressing and holding specific buttons on both the drone and the controller.
A successful pairing is often indicated by solid LED lights on both devices. If pairing continues to fail, try restarting both the drone and controller, and repeat the pairing procedure. Maintaining a close proximity during pairing can also improve success rates.
Pre-Flight Checks
Before each flight, thorough pre-flight checks are crucial for safe and enjoyable operation. First, verify sufficient battery levels in both the drone and the remote controller to prevent unexpected landings. Second, calibrate the gyroscope. This ensures stable flight by leveling the drone on a flat surface and following the specific calibration procedure outlined in your drone’s manual.
Inspect propellers for any damage or obstructions. Confirm all components are securely attached. A pre-flight check minimizes risks and maximizes flight performance.
Checking Battery Levels (Drone & Controller)
Prior to flight, meticulously check the battery levels of both your Syma drone and the remote controller. Insufficient power is a primary cause of crashes and lost connections. Observe the LED indicators on the drone; a red light typically signifies charging, while its absence indicates a full charge.
For the remote controller, ensure fresh batteries are installed or that the rechargeable battery is adequately charged. Low battery levels can lead to reduced range and unpredictable behavior during flight. Always prioritize fully charged batteries!
Calibrating the Gyroscope
Gyroscope calibration is crucial for stable flight, especially after transport or if the drone exhibits drifting. To calibrate, place the drone on a perfectly level surface. Power on both the drone and the remote controller. Follow the specific calibration procedure for your Syma model – typically involving moving both control sticks simultaneously to a designated corner position.

Successful calibration is indicated by solid LED lights or a specific beep sequence. Recalibrate if the drone continues to drift or behave erratically, ensuring optimal performance and control during flight.
Basic Flight Controls
Mastering basic flight controls is essential for a successful Syma drone experience. The left joystick controls throttle (up/down) for ascending and descending, while the right joystick manages yaw, rotating the drone left or right. Coordinating both joysticks enables pitch (forward/backward) and roll (left/right) movements.
Practice smooth, deliberate movements. Small adjustments are key to maintaining stable flight. Familiarize yourself with how each control affects the drone’s orientation before attempting complex maneuvers. Consistent practice builds muscle memory and improves control.
Throttle Control (Ascend/Descend)
Throttle control, managed by the left joystick, dictates the drone’s altitude. Pushing the joystick upwards increases power to the motors, causing the drone to ascend. Conversely, pulling the joystick downwards reduces power, initiating a descend.
Begin with gentle throttle adjustments. Rapid movements can lead to unstable flight. Observe the drone’s response and learn to anticipate its movements. Maintaining a steady throttle position is crucial for hovering. Practice smooth transitions between ascent, descent, and hovering for optimal control.
Yaw Control (Rotation)
Yaw control, typically assigned to rotating the right joystick left or right, governs the drone’s horizontal rotation. Rotating the joystick clockwise will cause the drone to rotate clockwise, while counter-clockwise rotation of the joystick results in a counter-clockwise turn.
Precise yaw control is essential for maintaining orientation and capturing stable footage. Start with small adjustments to avoid overshooting your desired heading. Practice coordinating yaw with other controls for smooth, controlled maneuvers. Mastering yaw allows for dynamic flight patterns and precise positioning.
Pitch & Roll Control (Forward/Backward, Left/Right)
Pitch and roll control, usually managed by the left joystick, dictates the drone’s movement in relation to the pilot. Pushing the joystick forward initiates forward movement, while pulling it back causes the drone to move backward.
Moving the joystick to the left makes the drone drift leftward, and to the right results in rightward movement. These controls are fundamental for navigating the drone and require practice for smooth, coordinated flight. Combine pitch and roll with yaw for complex maneuvers.
Flight Modes
Syma drones often feature multiple flight modes to enhance the flying experience and cater to different skill levels. Headless Mode simplifies control by disregarding the drone’s actual orientation; forward always means forward relative to the pilot, regardless of drone rotation.
Altitude Hold Mode maintains a consistent altitude, preventing unwanted ascent or descent, making it easier to focus on horizontal movement and capture stable footage. These modes are selectable via the remote controller and offer increased control and stability.
Headless Mode Explained
Headless Mode, also known as “I Don’t Know Which Way is Forward” mode, fundamentally changes how the drone responds to directional commands. Normally, forward on the transmitter corresponds to the drone moving in the direction its nose is pointing. However, in Headless Mode, forward always means away from the pilot, irrespective of the drone’s current rotation.
This simplifies control, especially for beginners, as orientation becomes less critical. It eliminates confusion when the drone rotates, making it easier to navigate and return to the pilot. Activation is typically done through the remote controller.
Altitude Hold Mode Functionality
Altitude Hold Mode is a crucial feature for stable aerial photography and videography, and for novice pilots. Once activated, the drone automatically maintains a consistent altitude, resisting the effects of wind or slight throttle adjustments. This allows the pilot to focus on horizontal movement and framing shots without constantly managing the drone’s vertical position.
The 6-axis system, present in models like the X8C, contributes to the effectiveness of Altitude Hold. It simplifies flight, making it easier to capture smooth, steady footage and maintain control in varying conditions.
Advanced Features
Syma drones offer exciting capabilities beyond basic flight. Many models, such as the X8C Venture, are equipped with cameras for capturing both video and still photographs, enhancing the flying experience. Furthermore, skilled pilots can attempt 360° rolls and other stunts, showcasing the drone’s agility and responsiveness.
The 4-axis structure, a defining characteristic of Syma drones, enables these advanced maneuvers. This design provides the necessary flexibility and speed for performing complex aerial acrobatics, adding a layer of fun and challenge to drone operation.
Camera Operation (Video & Photo)
Many Syma drone models, like the X8C Venture, integrate a camera for aerial photography and videography. Before flight, ensure the camera is securely mounted and the memory card is properly inserted. During flight, utilize the remote controller to initiate video recording or capture still images.
Review captured footage on a computer after landing. Image quality can vary depending on lighting conditions and drone model. Experiment with different angles and altitudes to achieve desired results. Remember to comply with local regulations regarding drone camera usage.
360° Rolls and Stunts
Syma drones, thanks to their 4-axis structure, are capable of performing 360° rolls and other aerial stunts. However, these maneuvers require ample open space and a degree of piloting skill. Initiate a 360° roll using a dedicated button or combination of joystick movements on the remote controller.
Ensure sufficient altitude before attempting stunts to prevent crashes. Practice in a safe, obstacle-free environment. Be aware that performing stunts drains the battery faster. Always prioritize safe flying practices and understand your drone’s limitations before attempting advanced maneuvers.
Troubleshooting Common Issues
Drone Not Responding: First, verify remote controller batteries are correctly installed and charged. Ensure the drone and controller are properly paired; re-pairing may be necessary. Check for interference from other devices. If issues persist, restart both the drone and controller.
Unstable Flight/Drifting: Calibrate the gyroscope following the instructions in the pre-flight check section. Confirm propellers are securely attached and undamaged. Wind can significantly affect stability; avoid flying in strong gusts. Low battery levels can also cause erratic behavior.
Drone Not Responding to Controller
If your Syma drone isn’t responding, begin by confirming the remote controller has fresh, correctly installed batteries. Next, meticulously check the pairing process; a re-pairing attempt is often the solution. Ensure no other wireless devices are causing interference in the immediate vicinity.
A simple restart of both the drone and the remote controller can resolve many connectivity issues. Verify the drone’s power is on and the indicator lights are functioning as expected. If problems continue, consult the full user manual for advanced troubleshooting steps.
Drone Drifting or Unstable Flight
Experiencing drift or instability? The first step is to calibrate the gyroscope, as this is crucial for stable flight. Ensure you’re flying in a calm environment, away from strong winds, as the 4-motor design, while offering maneuverability, can be affected.
Inspect the propellers for any damage or obstructions; even a minor imperfection can cause imbalance. Confirm all components are securely attached. If the issue persists, review the user manual for specific troubleshooting related to gyro calibration and flight adjustments.
Maintenance and Care
Regular maintenance extends your Syma drone’s lifespan. Cleaning should be done with a soft, dry cloth to remove dust and debris, avoiding any liquids near the electronics. Proper battery storage is vital; do not leave batteries fully charged or completely discharged for extended periods.
Always handle batteries with care, avoiding drops or punctures. Inspect propellers regularly for damage and replace them when necessary to maintain stable flight. Following these simple steps ensures optimal performance and longevity of your drone.
Cleaning Your Syma Drone
Maintaining a clean Syma drone is crucial for optimal performance. Regularly wipe down the drone’s body with a soft, dry cloth to remove accumulated dust, dirt, and grime. Avoid using any liquids, solvents, or abrasive cleaners, as these can damage the sensitive electronic components.
Pay particular attention to the propellers and motor areas, ensuring they are free from obstructions. A clean drone experiences improved aerodynamics and more stable flight characteristics. Consistent cleaning contributes significantly to the longevity of your device.
Battery Storage and Handling
Proper battery storage is vital for maximizing the lifespan and performance of your Syma drone’s battery. When not in use for extended periods, discharge the battery to approximately 40-50% capacity. Store the battery in a cool, dry place, away from direct sunlight and extreme temperatures.
Never leave a fully charged or fully discharged battery unattended for prolonged durations. Always use the designated Syma charger to avoid damage. Handle the battery with care, avoiding drops or impacts, as physical damage can compromise its safety and functionality.
Safety Guidelines
Prioritize safety when operating your Syma drone. Always fly in open areas, free from obstructions like trees, buildings, and power lines. Maintain a safe distance from people and animals, ensuring a clear flight path. Avoid flying near airports or in restricted airspace, adhering to local regulations.
Be mindful of weather conditions; strong winds can affect drone stability. Never attempt to fly in rain or inclement weather. Regularly inspect the drone for any damage before each flight. Responsible operation ensures a safe and enjoyable flying experience for everyone.
Flying in Safe Environments
Selecting a suitable flying location is paramount for safe drone operation. Opt for spacious, open areas devoid of obstacles such as trees, buildings, and vehicles. Avoid densely populated areas, ensuring a significant distance from bystanders and animals. Prioritize fields, parks, or large indoor spaces with high ceilings.

Be aware of potential interference sources like power lines and cell towers. Always check local regulations regarding drone flight, respecting airspace restrictions. A pre-flight assessment of the environment minimizes risks and promotes responsible flying.
Avoiding Obstacles and People
Maintaining a safe distance from obstacles and people is crucial during Syma drone flight. Utilize the drone’s maneuverability to navigate around trees, buildings, and power lines. Always prioritize a clear flight path, anticipating potential hazards. Never fly directly over individuals, even in open spaces, to prevent accidental injury.
Be mindful of your surroundings and maintain visual line of sight with the drone at all times. A responsible pilot proactively avoids risky situations, ensuring the safety of both the drone and those nearby. Prioritize caution and awareness.
Replacing Parts
Maintaining your Syma drone often requires replacing worn or damaged components. Finding compatible replacement parts is essential for continued safe operation. Propellers are frequently replaced due to crashes or wear and tear; ensure you purchase the correct size and type for your specific model (X5C, X8C, X12, etc.).
Carefully disconnect the battery before attempting any repairs. Online retailers and hobby shops typically stock Syma drone parts. Always double-check compatibility before ordering, and follow any included instructions during the replacement process.
Finding Compatible Replacement Parts
Locating the correct replacement parts for your Syma drone is crucial for maintaining its functionality and safety. Online marketplaces like Amazon, eBay, and specialized drone retailers are excellent starting points. Always verify the part number and compatibility with your specific Syma model – X5C, X8C, or X12 – before purchasing.
Official Syma websites or authorized dealers can also provide genuine parts. When in doubt, consult online forums or communities dedicated to Syma drones for recommendations and guidance from experienced users. Prioritize quality and ensure the parts meet safety standards.
Replacing Propellers
Damaged propellers are a common issue, easily addressed with replacements. First, power off the drone and remove the battery for safety. Identify the correct propeller type – clockwise (CW) or counter-clockwise (CCW) – usually marked on the prop itself. Gently remove the broken propeller by twisting or pulling, depending on the model’s design.
Attach the new propeller, ensuring it’s securely fastened. Double-check that each propeller is in the correct position before powering on the drone. Incorrectly installed propellers will cause unstable flight. Regularly inspect propellers for cracks or damage.
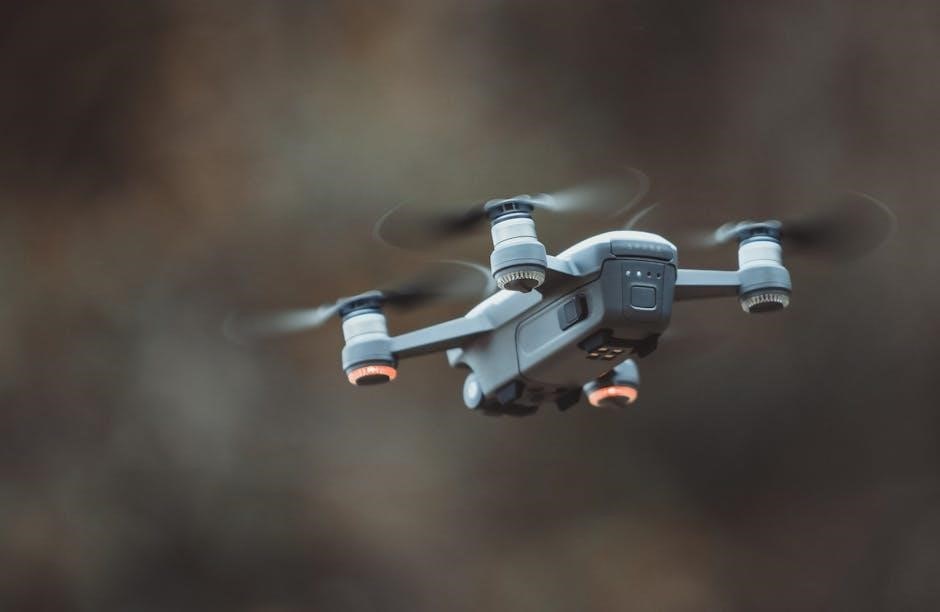
Understanding the 4-Motor Construction
Syma drones utilize a four-motor design, a key feature contributing to their stability and flight capabilities. This configuration provides redundancy; if one motor fails, the others can often compensate, allowing for a controlled landing. The 4-motor setup delivers increased speed and exceptional maneuverability, making these drones suitable for both indoor and outdoor environments.
This design excels in windy conditions, offering better control compared to drones with fewer motors. The balanced thrust from each motor enables agile movements and precise positioning during flight, enhancing the overall flying experience.
Benefits of a 4-Motor Design (Speed & Maneuverability)
The four-motor construction of Syma drones directly translates to superior speed and maneuverability. Each motor independently controls a propeller, allowing for precise adjustments to thrust and direction. This results in quicker response times to pilot commands and the ability to perform agile movements, including rapid turns and swift acceleration.
This design provides enhanced stability, even in moderately windy conditions. The distributed thrust minimizes the impact of gusts, maintaining a more controlled and predictable flight path. It’s ideal for both recreational flying and capturing dynamic aerial footage.
Indoor vs. Outdoor Flight Capabilities
Syma drones, thanks to their 4-motor design, demonstrate versatility in both indoor and outdoor environments. Indoors, the drones’ maneuverability allows for navigating confined spaces, though caution regarding obstacles is crucial. Outdoors, the same design provides stability against mild wind, enabling controlled flight.
However, stronger winds can significantly impact performance. While capable of outdoor flight, open areas with minimal obstructions are recommended. The 4-motor setup balances power and control, making these drones suitable for both casual indoor fun and outdoor exploration.